Showing posts with label Pie. Show all posts

Friday, March 4, 2011

0 TARTINE BAKERY'S PUMPKIN PIE - RIP NANA

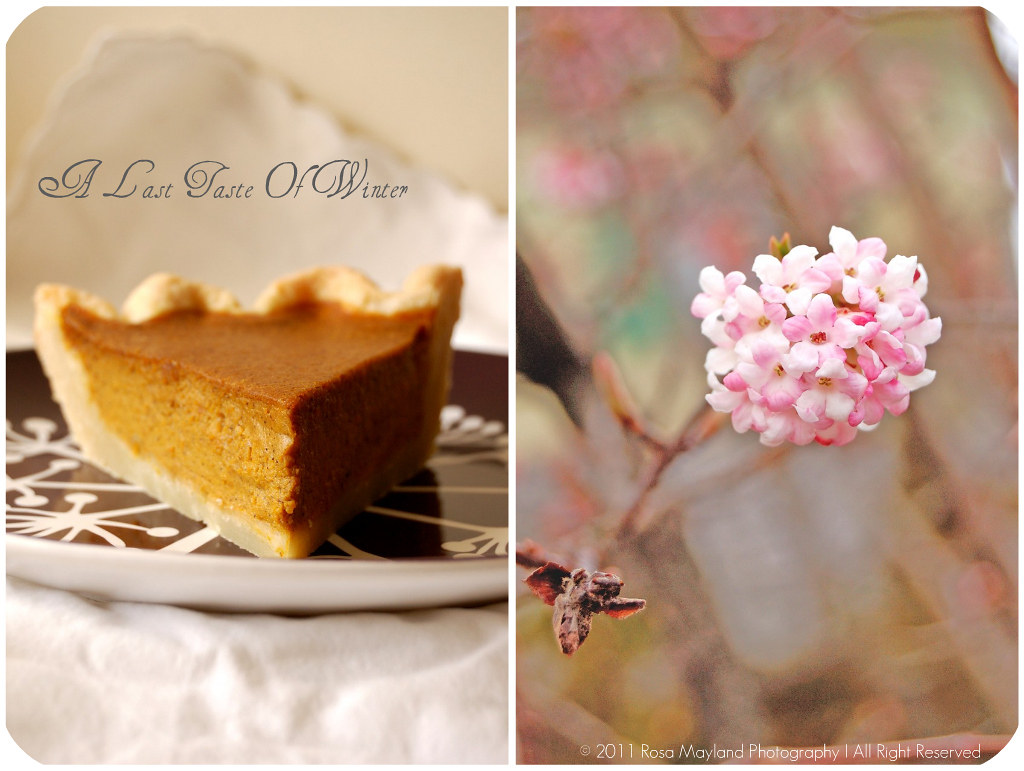
Pumpkin Pie Picnik collage 3 bis
Today, I wish to dedicate my post to my beloved English grandmother Jean Margaret Robinson (née Cutts, 13.09.1927-18.02.2011) who passed away peacefully on Friday the 18th of February 2011 at the age of 84, nearly two years after my grandfather death. She was the last of my grandparents and my only link to England, the country where my heart belongs and my second home (I have dual nationality).

I might not have had a very close or deep relationship with her, and although still w
onder what she thought of me or if she loved me (unfortunately, the members of my family have never been known for expressing or showing their feelings) she has had a big influence on me as she was an admirable cook and baker who always delighted everybody with her divine creations. Eventhough she was not the attentionate, generous and present grandmother I dreamt of having, I will always remember her for being a remarkable person when it came to handling the pots and pans or to whip up the most palatable Sunday roast.

I particularly respect and thank my Nan for having been extremely talented in the kitchen and for being my culinary guide. She was a person
who showed me what traditional British food is supposed to taste like, whose cooking skills I have always wanted to acquire and whom I considered an authority in all things gourmet. She was clearly gifted in that domain (not only though - she also mastered other arts like painting, knitting, working with silver, etc...). I am so glad she indirectly motivated me to develop my craftiness for all things food-related. I really hope that from the heaven's above my granny is happy to see that I have surpassed her as a cook/baker and she is pleased with the adult I have become...

Unfortunately we have not spent much time together. My grandma was never enclined to sh
are a moment of complicity with granddaughter. She rarely showed me how to prepare food and hated having me "in her feet" when she was busy making dishes or baking cakes. In those moments, my grandmother didn't want to have a kid around her.

The only memory I have of me actually baking with my granny is when I beg
ged her to make "Coffee Kisses" cookies with me. As I had a little tantrum and whined a lot, Nana reluctantly gave way to my wish and accepted to show me how to prepare that divine treat. She didn't know that more than 20 years later I'd be blogging about that exceptional event and fondly cherishing that memory...
Pumpkin Pie Picnik collage 1 bis
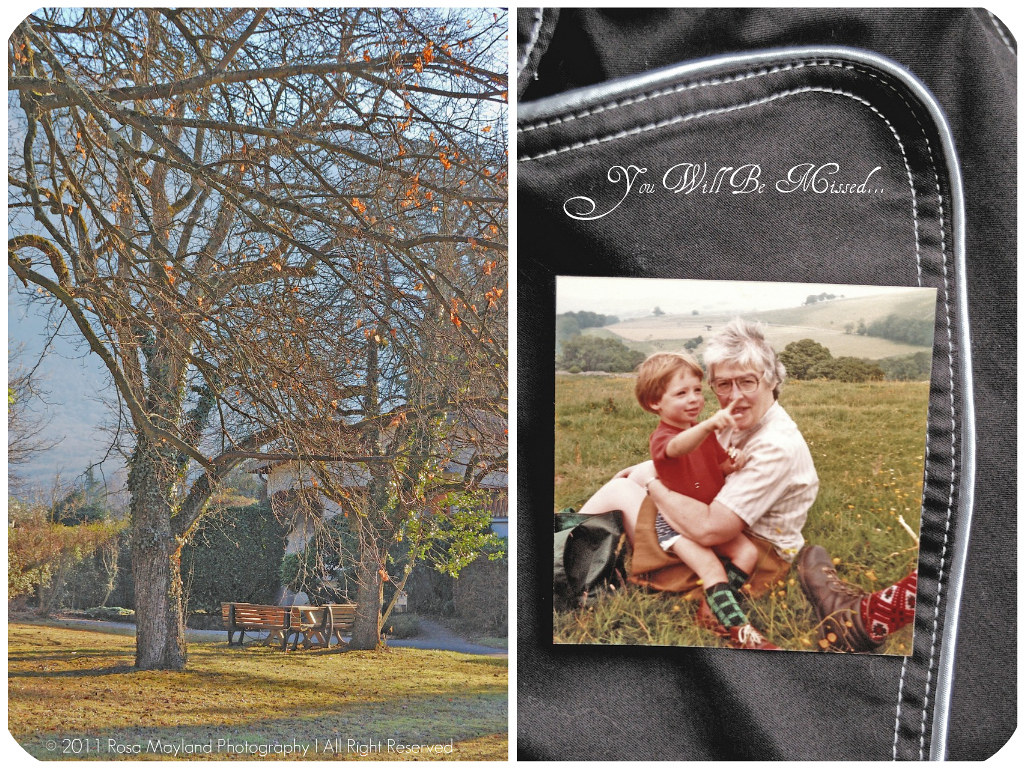
~ My grandmother and I, Derbyshire summer 1980 ~

RIP Nan.
I would have been extremely happy to hear you say "I love you"
or that you were proud of me,
but sadly I always waited for a sign of recognitions from you.
It is such a pity so many words were unspoken...
Anyway, I wish to thank you for all the good memories.
Love & kisses.
Rosa xxx

~~~~~~~~~~~~~~~~~~~~~~

My post being about endings and new beginnings, it is all natura
lly that I will present a recipe which marks the conclusion of wintertime and the commencement of spring. By baking the last "Pumpkin Pie" of the cold season, it is my way of celebrating the circle of life, the endless passing of time and the complimentarity of life and death.

Last October I bought a few pumpkins to decorate my balcony table. They have kept very well and were exposed there until last week. Now that the nights are less cold and the days are a lot warmer, they have started to rot so as I hate to throw away food I decided to use my two small Japanese chestnut pumpkins ("Potimarron" in French) in order to put together a classic American "Pumpkin Pie".

As a child I was not keen on eating my mother's "Pumpkin Tarts" ("Tarte A La Courge", the Swiss equivalent of "Pumpkin Pie"), yet now I am very fond of that speciality. I remember that Fridays were officially called "tart days". A time of the week I particularly looked forward to as the weekend was very close (though I had to go to school on Saturday mornings, till 12pm) and we got to eat yummy stuff then.

My mother's
seasonal tarts were always greeted with much excitement, but the only time I was a little less than thrilled by what was awaiting us at the dinner table was when "Pumpkin Tart" was on the menu. One of the reason why I had a certain aversion for that treat is because the pumpkin used wasn't the kind you'd make sweet desserts with, but rather savory dishes. It had too much of a vegetable flavor to be enjoyable. The other reason is that my parents were never big fans of hyper spicy pastries (my mother only incorporated a little nutmeg and cinnamon to her filling) and unlike Americans, they especially disliked using cinnamon with a heavy hand. So even if her tart was made with quality produce (pumpkins from the market) and double cream it lacked a bit of oomph as the filling was not as luscious and rich-tasting as the one of the US "Pumpkin Pie"...

Now that I bake my own "Pumpkin Pies" I can fully enjoy that confection and play around with aromas. A few years ago I blogged about my own adaptation of a recipe I found in the book "Culinaria US" (please forgive the bad picture!) and while it is quite flawless it doesn't mean that I am not interested in trying other recipes. After all I am a foodie who cannot stop being in search of perfection.

So, after having eyed an attractive "Pumpkin Pie" recipe in my new "Tartine" cookbook, I decided to see what it was worth. Well, I wasn't deceived by the end result as my boyfriend and I had no problem polishing off the pie dish within the next 48 hours.

As usual, I adapted it to my taste and replaced
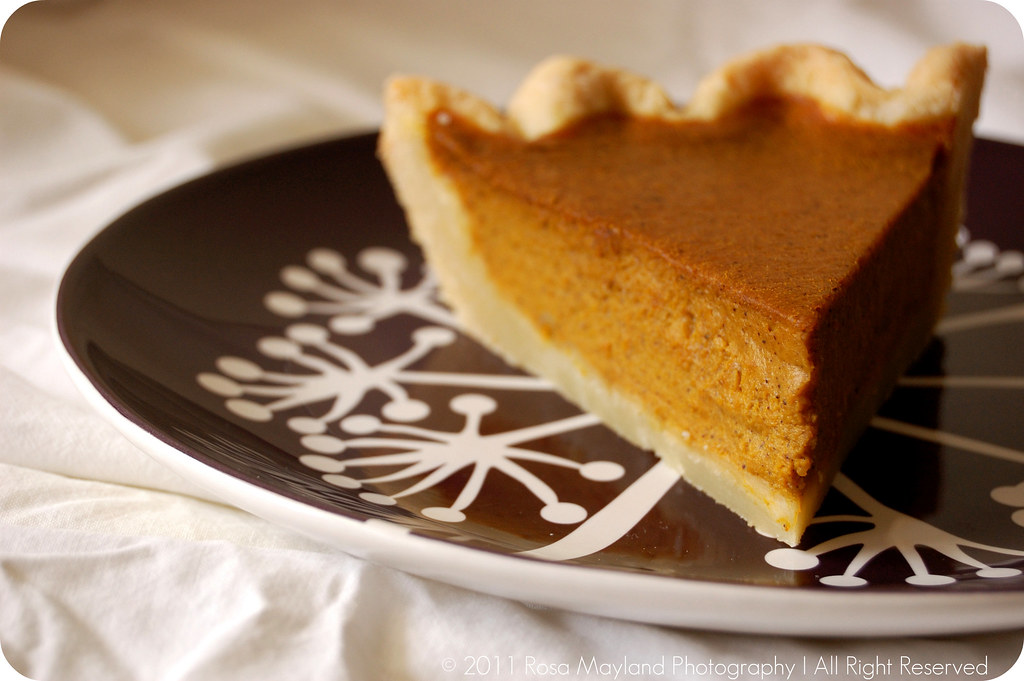
the brandy by rum, incorporated more salt to the pastry and added some additional cinnamon to the filling. Needless to say that Tartine Bakery's "Pumpkin Pie" was divine. It was not overly sweet, lusciously custardy, delightfully spicy, pleasantly earthy, wonderfully moist and had a refined flavor as well as a marvelously flaky and buttery pastry. In spite of being gorgeous I must point out that I might surely add a pinch of allspice to the filling the next time I bake this pie...
Pumpkin Pie 6 bis
~ Tartine's Pumpkin Pie ~

Recipe adapted from the book "Tartine" by Elisabeth Prueitt and Chad Robertson.

Makes a 25cm (10-inch) pie.

Ingredients For The "Flaky Pie Crust":
1 1/2 Tsp Fine sea salt
2/3 Cup (150ml) Ice cold water
3 Cups + 2 Tbs (455g) All-purpose flour
1 Cup + 5 Tbs (300g) Chilled butter, cut into small cubes
Ingredients For The "Pumpkin Filling":
2 Cups (510g) Pumpkin purée
3 Large egg
1 Large yolk
1 Cup (250ml) Double cream (35% fat)
2 Tbs Rum
1/2 Cup (100g) Light brown sugar
1 1/2 Tsp Ground cinnamon
1 Tsp Ground ginger
A pinch Ground cloves
A pinch Freshly grated nutmeg
A pinch Freshly ground black pepper
1 Tsp Fine sea salt

Method for the "Flaky Pie Crust":
1. Place the flour and salt in a big bowl.
2. Add the butter.
3. Using a pastry blender, cut the butter into the flour until you obtain a mixture ressembling coarse sand.
4. Pour the water over the crumbly mixture. Stir and toss with the help of a knive until the dough starts to come together.
5. Continue mixing (very gently) until you obtain a ball of dough which is not completely smooth. 6. On a floured surface, divide pastry in two, shape into a 2.5cm (1-inch) thick disk and wrap in plastic film.
7. Put in the fridge and let rest for about 2 hours or overnight.
8. Roll out one of the disks on a lightly floured surface to a thickness of 0.3cm (1/8 inch thickness) and from the center toward the edge in all directions, without forgetting to lift and rotate the pastry a quarter turn every now and then.
9. Once your pastry is a circle 1 1/2 inches larger than the tart pan, carefully transfer it to the buttered pan (folding in half, if necessary).
10. Ease it into the bottom and sides of the pan and pressing into place. Trim the edge with a knife.
11. Prick the bottom of the pastry with a fork, line with baking paper and fill with pie weights or dry beans.
12. Preheat the oven to 190° C (375° F).
13. Bake blind until the surface of the dough looks dry and has no opaque areas left, about 20 minutes.
14. Remove from the oven and remove the paper as well as the weights/beans, then return the shell to the oven for an extra 2-5 minutes (if the center starts to rise, gently pierce with a knife tip).
15. Let cool completely on a wire rack before filling.

Pumpkin Pie Picnik collage 5 bis
Method For The "Pumpkin Filling":
1. Preheat the oven to 160°C (325°F).
2. In a medium bowl, whisk together the pumpkin purée, whole eggs, egg yolk, cream and rum until smooth.
3. Add the the sugar, spices and salt. Mix until well blended.
4. Pour the filling into the pie shell and bake for about 1 hour, or until the pie is just set but the center is ever so slightly jiggly (the filling continues to set as it cools).
5. Cool completely on a wire rack.

Remarks:
Make sure that you pumpkin purée is not too wet. Cook it a bit longer to let the liquid evaporate or place in a sieve overnight in order to get rid of the excess moisture.
If you wish you cxan replace the rum by brandy, cognac, whisky or sherry.
You can add a little more sugar to the filling if you find that it is not sweet enough.

Serving suggestions:
Serve at room temperature with whipped cream.

~~~~~~~~~~~~~~~~~~~~~~
Pumpkin Pie Picnik collage 6 bis
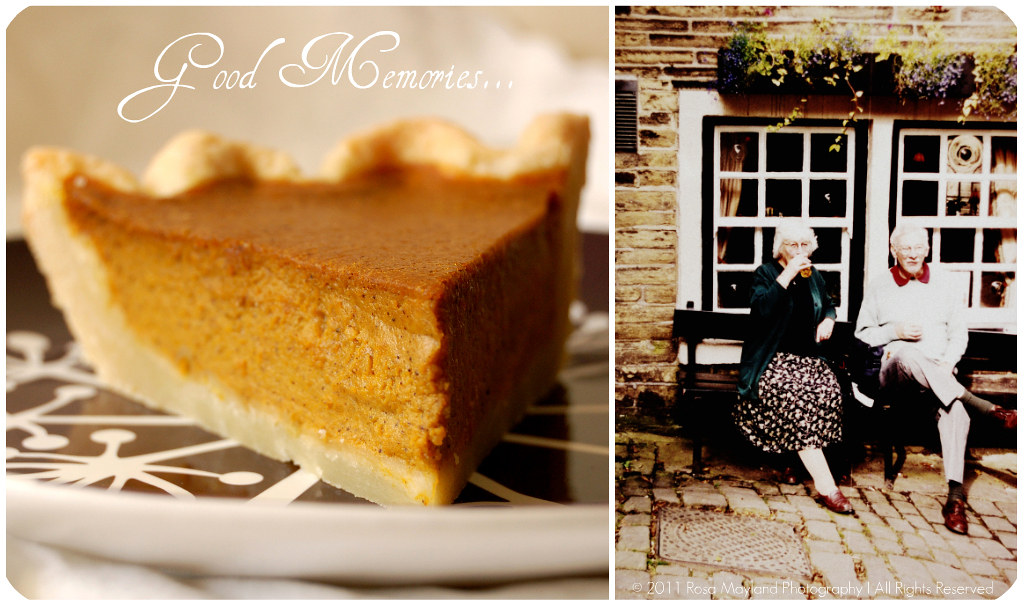
~ Jean & Roy in front of a pub somewhere in Derbyshire in 1998 ~

~ Pumpkin Pie Selon Tartine Bakery ~


Recette adaprée du livre "Tartine" par Elisabeth Prueitt and Chad Robertson.

Pour un pie de 25cm de diamètre.

Ingrédients Pour la "Pâte Brisée":
1 1/2 CC de Sel de mer fin
150ml d'Eau très froide
455g de Farine blanche
300g de Beurre très froid, coupé en petits cubes
Ingrédients Pour La "Garniture":
510g de Purée de potimarron
3 Gros oeufs
1 Jaune d'oeuf
250ml de Crème double (35% de mat. grasses)
2 CS de Rhum
100g de Sucre brun clair
1 1/2 CC de Cannelle en poudre
1 CC de gingembre en poudre
Une pincée de Clous de girofles en poudre
Une pincée de Noix de muscade fraîchement râpée
Une pincée de Poivre noir fraîchement moulu
1 CC de Sel de mer fin
Méthode Pour la "Pâte Brisée":
1. Dans un grand bol, mélanger la farine au sel.
2. Ajouter le beurre.
3. A l'aide d'un malaxeur à pâtisserie, couper le beurre dans la farine jusqu'à obtention d'une mixture ressemblant un crumble.
4. Incorporer l'eau et mélanger à l'aide d'un couteau de table.
5. Continuer à mélanger (délicatement) jusqu'à ce que vous obteniez une boule de pâte (pas trop homogène tout de même).
6. Sur une surface farinée, diviser la pâte en deux portions égales e t les former un deux disques de 2.5cm d'épaisseur, puis les emballer avec du film plastique.
7. Les mettre au frigo (2 heures au minimum ou une nuit).
8. Sur une surface farinée étaler (en allant du centre en direction des bords et en rotatant la pâte de temps en temps) un des disques de pâte à une épaisseur de 0.3cm.
9. Une que que vous aurez obtenu un cercle de pâte de 33cm (plus grand que le moule), le transférer délicatement dans le moule.
10. Garnir le moule avec la pâte et couper les bords.
11. Piquer le fond du pie avec une fourchette, Protéger la pâte piquée avec une feuille de papier sulfurisé découpée à la dimension voulue et remplir avec des billes de cuisson ou des haricots.
12. Préchauffer le four à 190° C.
13. Cuire à blanc pendant 20 minutes, ou jusqu'à ce que la surface de la pâte soit sèche et n'ait plus de zones opaques.
14. Sortir la pâte du four et retirer le papier avec les poids, puis la remettre au four pour 2-5 minutes supplémentaires (si le centre gonfle, piquer la pâte avec la pointe d'un courteau).
5. Laisser refroidir sur une grille avant de remplir avec la garniture.
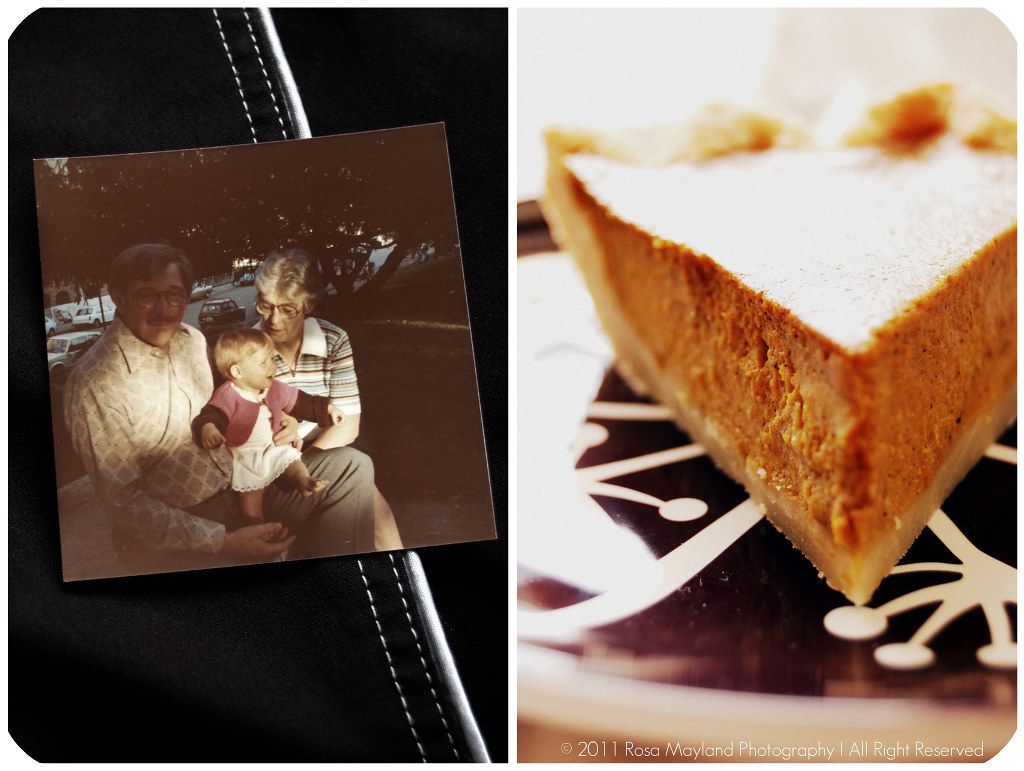
Pumpkin Pie Picnik collage 2 bis
~ My grandfather, my grandmother & I, Geneva 1978 ~

Méthode Pour La "Garniture":

1. Préchauffer le four à 160°C.
2. Dans un bol moyen, battre ensemble la purrée de potimarron les oeufs, le jaune d'oeuf, la crème et le rhum afin d'obtenir une masse homogène.
3. Ajouter le sucre, les épices et le sel. Bien incorporer.
4. Verser la garniture dans le moule et cuire pendant 1 heure, ou jusqu'à ce que la garniture soit un peut tremblotante en son centre (elle continuera à se solidifier pendant q u'elle refroidira).
5. Laisser refroidir sur une grille.

Remarques:
Votre purrée de potimarron doit être assez épaisse et ne pas contenir de liquide. Afin de réduire la quantité de liquide, cuire la purrée jusqu'à ce que le liquide se soit évaporé ou mettre la purrée dans une passoire et laisser égoutter pendant toute une nuit.
Vous pouver remplacer le rhum par du sherry, whisky, du brandy ou du co gnac.
Si la garniture n'est pas assez sucrée, il vous est possible d'ajouter plus de sucre.

Idées de présentation:
Servir à température ambiante avec de la crème fouettée.
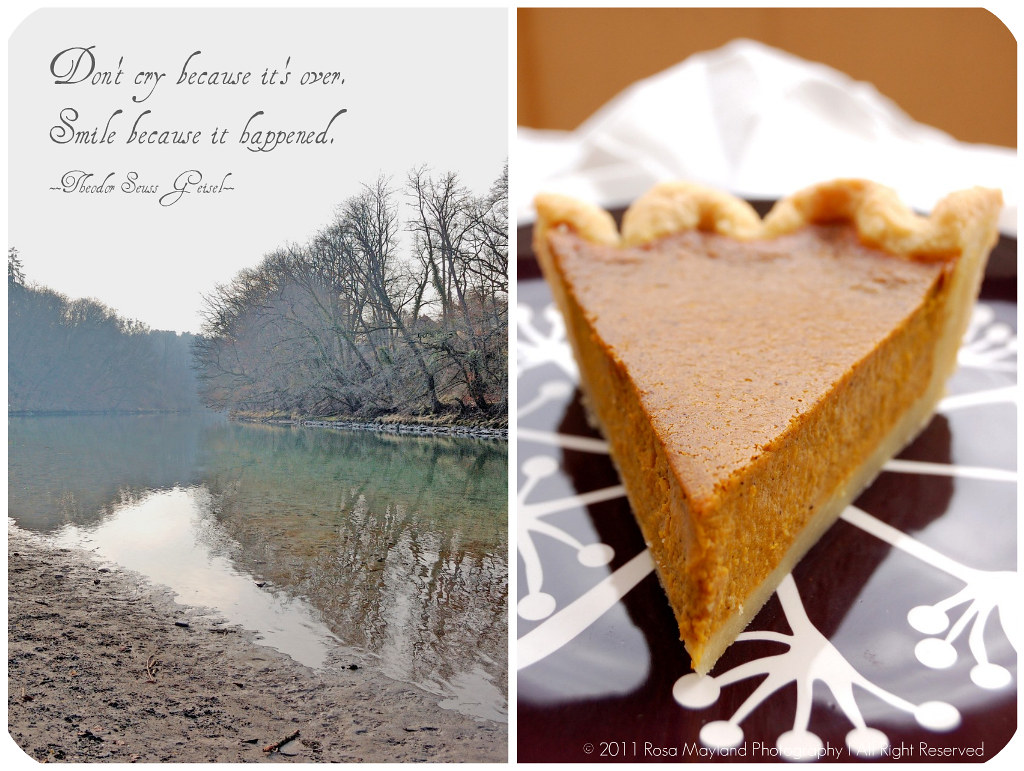
Pumpkin Pie Picnik collage 4 bis

Tuesday, August 4, 2009

0 BLACKBERRY PIE BARS

Since quite a while, I've been systematically coming across a "The Pastry Queen" recipe for "Blackberry Pie Bars" on many of the blogs I visit and, as I'm a immense (black)berry lover as well as a big bar fanatic, I could not resist the temptation of baking them myself...

"The Pastry Queen" is a Texas treat, best-selling cookbook that has cought my attention since the day it was released. Unfortunately, until now, I had never tested one of their recipes and always had doubts about wether or not I should buy this book. Well, I must say that after having made those fantastic bars, there is no need to convince me to add "The Pastry Queen" to my long list of cookbooks which should sit in my cookery bookshelf!

First of all, it must be said that those bar cookies have a name which brings confusion. I personally don't find that those "Blackberry Pie Bars" have anything in common with pies nor do they ressemble one for the following reasons:
1. The crust is shortbready and very different from flaky pastry
2. The filling is dense and custardy in texture, just like clafoutis. Fruit pies generally have a straight forward and less copious filling consisting of
berries/fruits, sugar, spices and a thickening agent.

Nonetheless, thos facts don't take anything away from those squares' unshakable appeal as they are totally sexy, terrifyingly luscious and incredibly flavorful. So the mistitling isn't all that important at the end. We are not going to dither any longer over the subject...

This summery goodness is irresistibly rich and pleasantly sweet, yet not sickly at all. The ambrosial flavors of blackberries (slightly biting and smoky), butter (round and nutty), lemon (refreshingly zesty) and sour cream (pleasurably tangy) blend well together, and the contrasting textures (smooth, creamy and crunchy) transform those bars into the most exquisite treat.

Those "Blackberry Pie Bars" are terrific and will bring joy amongst your munchers (children and grownups alike) who will chomp on them greedily as they taste like heaven and are addictive like hell!

~ Blackberry Pie Bars ~
Recipe adapted from "The Pastry Queen".

Makes about 24 bars.

Ingredients for the "Crust":
3 Cups (383g) All-purpose flour
1 1/2 Cups (315g) Castor sugar
1/4 Tsp Sea salt
1 1/2 Cups (3 sticks/360g) Chilled unsalted butter, cut into cubes
The zest of two lemons
Ingredients for the "Blackberry Filling":
4 Large eggs
2 Cups (420g) Castor sugar
1 Cup (240g) Sour cream
3/4 Cup (96g) All-purpose flour
1 Pinch Sea salt
16oz (480g) Frozen blackberries, defrosted and drained (see remarks)

Method for the "Crust":
1. Preheat the oven to 180° C (350° F).
2. Grease a 9 x 13-inch backing pan with b
utter or cooking spray and set aside.
3. Zest two lemons.

4. Measure out the sugar onto a clean work surface. Rub the lemon zest into the sugar with a bench scraper or the back of a spoon.
5. Combine lemon sugar, flour, salt and butter in an electric mixer fit with a paddle attachment. Beat the ingredients on medium speed until the mixture looks dry and crumbly.
6. Reserve 1 1/2 cups of the crust mixture to use as the topping. Press th
e remaining mixture into the bottom of the pan.
7. Bake the crust for 12 to 15 minutes until it is golden brown.
8. Let cool for 10 minutes while you ma
ke the filling.
Method for the "Blackberry Filling":
9. Whisk the eggs in a medium bowl. Add the sugar, sour cream, flour and salt.
10. Gently fold in the blackberries.

11. Spoon the mixture evenly over the crust (You may have to distribute the blackberries evenly around).
12. Sprinkle the reserved crust mixture evenly over the filling.
13. Bake for 45 to 55 minutes until the
top is lightly browned.
14. Cool on a wire rack for 1 hour before slicing.

Remarks:
You can also use 3 cups of fresh blackberries, or 1 (16oz/480g) package frozen blackberries. If you’re using frozen berries, be sure to defrost and drain the excess liquid. Place the frozen berries on a plate in the refrigerator overnight.
Instead of using blackberries, why not try making this recipe with other berries such as blackberries, strawberries or raspberries (or a mix of all four berries).
Rubbing the zest into the sugar will release oils from the zest and create a lemon scented sugar.
As this recipe gives a huge amount of bars and we are only two at home, I decided to divide the quantities and bake those bars in a 23x23cm (9 x 9-inch) sheet pan. It worked perfectly and gave at least big 12 portions.
Keep those bars in the fridge (2 to 3 days max.).

Serving suggestions:
Serve those bars with either vanilla or lemon ice cream.

***************

~ Carrés Aux Mûres ~
Recette tirée et adaptée du livre "The Pastry Queen".

Pour environ 24 carrés.

Ingrédients pour la "Croûte":
3 Tasses (383g) de Farine blanche
1 1/2 Tasses (315g) de Sucre cristallisé

1/4 CC de Sel de mer
1 1/2 Tasses (360g) de Beurre non-salé, froid, coupé en cubes
Le zeste de 2 citrons

Ingrédients pour la "Garniture Aux Mûres":
4 Gros oeufs
2 Tasses (420g) de Sucre cristallisé
1 Tasse (240g) de Crème aigre/sure

3/4 de Tasse (96g) de Farine blanche
1 Pincée de Sel de mer
480g de Mûres congelées, dégelées et égouttées (voir remarques)

Méthode pour la "Croûte":
1. Préchauffer le four à 180° C.
2. Graisser/beurrer une plaque de 23 x 33cm et
la mettre de côté.
3. Zester les 2 citrons.

4. Dans un petit bol, bien frotter le zeste avec le sucre, jusqu'à ce qu'il devienne humide et parfumé.
5. Dans un mixer, mettre le sucre parfumé, la farine, le sel et le beurre, puis pulser afin d'obtenir un mélange sableux (tel un appareil à crumble).

6. Mettre de côté 1 1/2 tasse de ce mélange, puis mettre le reste du "crumble dans le moule et bien foncer (applatir) avec les doigts.
7. Cuire la croûte pendant 12 à 15 minutes, jusqu'à ce qu'elle soit dorée.
8. Laisser refroidir 10 minutes sur une grille. P
endant ce temps préparer la garniture.

Méthode pour la "garniture Aux Mûres":
9. Battre les oeufs dans un bol moyen. Ajouter le sucre, la crème fraîche, la farine et le sel. bien mélanger.
10. Incorporer les mûres le plus délicatement possible.
11. Verser ce mélange sur la croûte et bien distribuer les mûres.
12. Saupoudrer de manière homogène avec le reste du "crumble".
13. Cuire pendant 45
à 55 minutes, jusqu'à ce que le dessus soit légèrement doré.
14. Laisser refroidir sur une grille et attendre au moins 1 heure avant de décou
per en tranches.

Remarques:
Vous pouvez utiliser 3 tasses de mûres fraîches ou 480g de mûres congelées. Si vous utilisez des mûres congelées, faites-les dégeler (une nuit au frigo) et égoutter au préalable.
Au lieu d'utiliser des mûres, pourquoi ne pas utiliser des myrtilles, des fraises ou des framboises (un mélange des 4 serait aussi parfait).
En frottant les zestes avec le sucre, vous libérez les huiles essentielles qui parfumeront votre sucre.
Etant donné que cette recette donne des quantité gargantuesques, je vous conseille de la diviser en deux et d'utiliser un moule de 23 x 23cm.
Conserver ces carrés au frigo (2 à 3 jours max.).

Idées de présentattion:
Servez ces carrés avec de la glace à la vanille ou au citron.

Wednesday, March 18, 2009

0 SWISS EASTER RICE TART - TARTE AU RIZ

As the Easter holidays are approaching, I thought that you might like to see a seasonal recipe on my blog and discover an offbeat dish instead of coming across the same old ones year after year...

In Switzerland, when the Easter period is nearing, we get to see "Rice Tarts" or "Gâteau de Pâques" in every supermarkets as well as in certain bakeries. Yet, although it seems to be quite a big thing here, at home, it has never been a custom to eat that speciality during passover. That has maybe to do with the fact that I have not been brought up in any kind of religious environment...

Anyway, this year, I thought that I'd satisfy my curiosity and learn more about our Swiss culinary traditions, so I decided to bake one of these intriguing tarts that is so popular in my country.

After a great deal of surfing in search of the perfect recipe, I came to the conclusion that if I was going to make a "Swiss Easter Tart", I was not going to use a Swiss recipe for the simple reason that I could not get a grip on any (on the web or in my personal recipe collection). My only source was, once again, going to be American (you American guys have some of the best cookbooks and recipe sites ever) and thanks to the great Nick Malgieri, I was finely going to be able to try that speciality and stop fantasizing about it!

"Easter Rice Pies" are very well-spread throughout the Northern part of Italy where they are called "Torta Di Riso" and are traditionally served alongside "Ricotta Pie" for Easter Sunday dessert, but it is less known that Switzerland also has it's own version of this lemon-scented custard tart made with rice, almond meal, milk and eggs.

While Italians line their tart shells with a filling resembling "Rice Pudding" or sweet "Risotto", we puree the rice preparation in order to get a smooth filling. The Swiss tart is also much lighter (made with milk) than our neighbor's pies which generally contain ricotta and/or cream.

Nick Malgieri's "Swiss Easter Tart" is really comforting, yet not heavy at all nor too sweet. This delightful dessert has a delicate ricy, milky, somewhat eggy (in a good way) and lemony flavor. Since the rice used is parboiled long-grain rice and it is cooked in boiling water first, the texture of this tart isn't as smooth or creamy as risotto or custard, but it is similar to that of a slightly starchy flan or omelet and is pleasantly rubbery.

A wonderful non-fussy and unusual brunch dish/dessert item that'll conquer you with it's delicacy and subtle aromas!

My blog was chosen as one of the must-see sites on this week's baking blog on the Guardian website (a British newspaper). See article here.

~ Swiss Easter Rice Tart ~
Adapted by Rosa's Yummy Yums from a recipe by Nick Malgieri.

Makes a 25cm (10-inch) tart.

Ingredients for the "Pastry":
1 1/2 Cups plus All-purpose flour and more for dusting
1 Tbs Granulated sugar
1/2 Tsp Salt
1 Tsp Baking powder
10 Tbs (150g/1 1/4 stick) Cold unsalted butter, cut into 10 pieces
4-6 Tbs Cold water
Ingredients for the "Rice Filling":
1/2 Cup Long-grain rice (parboiled/see remarks)
3 Cups Milk
1 Tbs (30g) Unsalted butter
1/2 Cup Granulated sugar
1/4 Tsp Salt
The zest of 1 organic lemon
1/2 Cup Ground blanched almonds
1 Tbs All-purpose flour
3 Large eggs (~63g)
Confectioners sugar, for dusting

Method:
1. Combine 1 1/2 cups flour, 1 tablespoon sugar, 1/2 teaspoon salt and the baking powder in food processor. Pulse to blend.
2. Add the butter and pulse 3 to 4 times, unt
il butter is in pea-size pieces.
3. Sprinkle in 4-6 tablespoons cold water. Pulse 4 times.

4. Turn dough out on lightly floured work surface and knead gently a few times to form a ball of dough that you'll shape into a disk and wrap in plastic.
5. Refrigerate at least 1 hour.
Method for the "Filling":
6. Meanwhile, half fill a medium (3 quart/3 l) saucepan with water, bring to a boil, stir in rice, lower heat to medium and cook until rice is soft, about 15 minutes.
7. Drain rice and return it to saucepan. Add milk, remaining butter, 1/2 cup sugar and salt.
8. Bring to a boil over medium heat. Reduce heat to low
and simmer until mixture has thickened almost to a risotto consistency, about 25-35 minute.

9. Place saucepan in a large bowl of ice and water 10 minutes, to cool mixture to tepid.
10. Purée in food processor.
11. Pour the mixture into a bowl and add lemon zest.

12. Mix ground almonds with 1 tablespoon flour, add t
o bowl and whisk in.
13. Whisk in eggs one at a time

14. Place oven rack in lowest position and preheat oven to 180° C (350° F).
15. Remove pastry from refrigerator and place on lightly flo
ured surface. Lightly dust top with flour. Use a rolling pin to press down on dough to soften it. Roll out disk to 28cm (12-inche) in diameter.
16. Transfer to a 22cm (10-inch) tart pan with a removable bottom. Press dough evenly into pan and prick the base of the dough. Trim edges flush with pan. Pour filling into pastry.
17.
Bake about 35 minutes, until filling is set and golden.
18. Cool on a rack.


Remarks:
At point 3, d
ough will not come together, so don't panick. It's absolutely normal.
You can replace the ground almonds by ground hazelnuts which are
a lot more traditional and, if you wish, you can use orange rind instead of lemon rind as well as add a little vanilla flavor to the filling.
Use Arborio or Vialone risotto rice instead of parboiled rice. In that way, your tart will end up being more creamy.

Serving suggestions:
Eat this tart with either whipped cream, sweetened mascarpone,
lemon curd or hot fruit compote (red fruits).

***************

~ Tarte Au Riz De Pâques (Suisse) ~
Recette de Nick Malgieri adaptée par Rosa's Yummy Yums 2009.

Pour une tarte de 25cm de diamètre.

Ingrédients pour la "Pâte":
1 1/2 Tasses (192g) de Farine blanche/fleur
1 CS de Sucre cristallisé

1/2 CC de Sel

1 CC de Poudre à lever
150g de Beurre non-salé, froid et coupé en 10 morceaux
4-6 CS d'Eau froide
Ingrédients pour la "Garniture Au Riz":
1/2 Tasse (100g) de Riz long grain (parboiled/voir remarques)
3 Tasses (720ml) de Lait

30g de Beurre non-salé
1/4 de CC de Sel
Le zeste d'un citron bio
1/2 Tasse (50g) Amandes (blanchies) moulues

1 CS de Farine blanche/fleur
3 Gros oeufs (~63g)
Soucre en poudre, pour décorer


Méthode pour la "Pâte":
1. Dans le bol d'un mixer, mettre la farine, le sucre, le sel et la poudre à lever. Mixer pour mélanger.
2. Ajouter le beurre et mixer en pulsant 3 ou 4 fois, jusqu'à ce que chaque morceau de beurre ait la taille d'un petits pois.
3. Ajouter l'eau et mixer tout en pulsant 4 fois.
4. Mettre le mélange sur une surface farinée et "pétrir" légèreme
nt afin de former une pâte, puis applatir en un disque.
5. Emballer dans du film plastique et mettre au frigo pendant au moins 1
heure.
Méthode pour la "Garniture Au Riz":
6. Pendant ce temps, remplir une casserole moyenne (3 l) avec de l'eau et porter à ébullition. Ajouter le riz et baisser la température. Cuire jusqu'à ce que le riz soit tendre, pendant 15 minutes.
7. Egoutter et remettre le riz dans la casserole. Ajouter le lait, le beurre, le sucre et le sel.
8. Porter à ébullition et baisser le feu, puis faire mijoter le mélange
(à feu moyen) pendant 25-35 minute.

9. Plonger la casserole dans de l'eau glacée afin de refroidir le mélange.
10. Mettre le mélange dans un mixer et réduire en une fine purée.

11. Verser dans un bol moyen et ajouter le zeste.
12.
Ajouter à la purée de riz et bien incorporer.
13. Ajouter les oeufs un par un. Battre l'apareil à l'aide d'un fouet afin qu'il soit homogène et lisse.

14. Placer une grille dans la partie inférieure du four et préchauffer à 180° C.
15. Sortir la pâte du frigo et la poser sur une surface farinée. Saupoudrer le dessus avec un peu de farine. Exercer une pression sur toute la pâte à l'aide d'un rouleau à pâtisserie afin qu'elle se ramolissent et qu'elle puisse être étalée. Rouler la pâte en un cercle de 28cm.
16. Foncer le moule et bien l'étaler. Couper les bords et piquer le fond avec une fourchette. Verser la garniture dans la pâte.

17. Cuire environ 35 minutes, jusqu'à ce que la garniture soit dorée et ferme.
18. Faire refroidir sur une grille.

Remarques:
Au point 3, ne paniquez pas si la pâte ne forme pas une boule. C'est tout à fait normal.
Pour la garniture, vous pouvez remplacer les amandes par des noisettes moulues (plus traditionnel) et, si vou voulez, vous pouvez utiliser le zeste d'une orange bio au lieu du zeste de citron et même ajouter 1 CC d'extrait de vanille.
Si vous voulez obtenir une garniture plus crémeuse, alors prenez un riz
de type Arborio ou Vialone (pour risotto) au lieu du riz long grains.

Idées de présentation:
Servez cette tarte avec de la crème fouettée, du mascarpone sucré, du lemon curd ou avec une compote de fruits rouges tiède.


breakfasts time Copyright © 2011 - |- Template created by O Pregador - |- Powered by Blogger Templates