Showing posts with label Cacao. Show all posts

Friday, January 27, 2012

0 DROP DEAD CHOCOLATE CAKE - GÂTEAU AU CHOCOLAT DÉCADENT

It is proof of a base and low mind for one to wish to think with the masses or majority, merely because the majority is the majority. Truth does not change because it is, or is not, believed by a majority of the people.
- Giordano Bruno
Every year, around the beginning of January, I witness the same circus. Food-related magazines, sites and blogs worldwide publish a list of all the forthcoming trends and give their predictions for the upcoming 11 months. After that, and until the next craze hits us comparably to a strike of lightning, the internet generally gets swamped with hip recipes, reviews of fashionable products and a wave of articles treating of those subjects furiously sweeps the web while a horde of professional as well as hobby journalists are sucked into the the eye of this powerful tornado.

Being somebody who naturally goes against the tide, dislikes blind copyism, loathes lack of individuality and disapproves of prefabricated movements, this annual proclamation of what we have to follow and this subliminal influencing of consumers makes me sick, go up the wall, smirk and chuckle as vogues are so limitating, artificial and superficial.

It always amazes me how a large number of people accept dictatorship of taste and have no problem being told what to do, to fancy, to speak about as well as in which way to act. Humanity really wants to be treated similarly to cattle and led in a pack-like manner as it makes them feel safe and not alone. Swimming with the stream gives them the sentiment of partaining to a group, thus not being an outsider. They are so afraid of alienation, segregation and unconventionality that they prefer to sacrifice their integrity for commonness so as to not get singled out by the leading majority.
These hipster zombies… are the idols of the style pages, the darlings of viral marketers and the marks of predatory real-estate agents.
 - Christian Lorentzen
Sadly, in this world we live, standing out from the crowd is really badly seen and labelled as something that is antisocial. Bollocks! Why should women and men who are true to themselves be unfriendly, not well integrated in society and secluded hermits? Maybe singularity is slightly unnerving for others as it is a mark of rebellion, uniqueness and freedom (as long as it is genuine and not another stylish attitude), but that doesn’t mean that it is a negative quality. As a matter of fact, it is a sign of intelligence and strength. Diacritic souls are honest, authentic, comfortable with their opinions and choices, don’t play games or suffer from dissociation. We have no need to create a fake identity and lie to ourselves in order to be recognized. What you see is what you get and if certain idiots don't like us, then they can get lost!

It is crucial to give no importance to the masses’ judgement or appraisal, and to find your own voice if you don’t want to be fake or manipulable. As you know, totalitarian dictatorships and politicians always achieve their goals by striking the chord of fear of rejection within the general public’s heart and missuse our human need to feel aknowledged as well as create strong ties with one another and blend into the flock (check out the movie "The Wave" as it describes this behavior pattern very well). This shows how dangerous it can be to comport oneself in a sheepish manner and deny your inner self to fit the mold. 
Never forget that only dead fish swim with the stream.
- Malcolm Muggeridge
Art is the most intense mode of individualism that the world has known.
 - Oscar Wilde
Diversity is beautiful and a great source of inspiration, while standardization is clinical and represents the death of the mind and of imagination. Take a look at some of the greatest artists and thinkers (poets, painters, writers, musicians, philosophers, etc…), had they not defied conventions, been non-conformists and had dissident visions, their creations/work would never have seen the light of day as they would never have had that special sparkle of life within themselves that made them such a genius.

To hell with fashions! They are only a means of control and the industry has also properly understood that since very long. For decades, it has shaped the minds of folks and been employing those psychological tricks to transform you into the perfect consumer, a robotic subordinate who never questions orders nor goes out of line.

Chocolate Cake 2 1 bis

Nowadays, food is extremely popular among a large fringe of the population and amazing amounts of cash are generated by it. This niche sees numbers of ephemeral trends come and go at the speed of light. Unfortunately, they are not all invented by persons with good intentions, but rather by avid entrepreneurs who milk the cow with them, don’t give a shit about locally grown veggies/fruits, budget or healthy eating, eco-friendly farming, the survival of gastronomy, the respect of the terroir, etc... Their interest is somewhere else and profit is their religion. Hence, if you want the culinary arts not evolve into a big commercial joke or to get hijacked by money hungry bastards, you’d better start cooking and baking without being influenced by corporations and not fall into their trap. Love food unconditionally, but not because of the fame it brings or the reputation it has and remember that hipsters come and go fast...

So, when I read somewhere macarons, whoopie pies and cupcakes were out, and that the next dessert obsession in 2012 will be layer cakes, I just had to laugh my guts out. Wow, what breathtaking piece of info! I mean, come on guys, don't you find that it sounds kind of déjà-vu? It is crazy how old stuff makes a regular comeback. That's what I call recycling and not novelty.

I didn't have to wait for this baked good (the same can be said about pickles, kimchi, scones, meatballls, etc...) to be approved by the public opinion to start showing some interest in it. Actually, I have been eating and baking that awesome tea time treat since a very tender age, so it is not dernier cri to me.
 
All greatness of character is dependent on individuality. The man who has no other existence than that which he partakes in common with all around him, will never have any other than an existence of mediocrity.
- James F. Cooper
My tastes don't vary according to fads. They are constant and timeless. If I enjoy a dish or a goodie, there is a big chance that I'll do so all my life. Sensationalism doesn't have any effect on me and I don't behave like a chameleon...

For example, I have a longstanding love affair with chocolate cake. It is one of the wonders of this world which I find terribly irresistible. Of course, not all chocolate cakes are equal. Some of them are just good, without being earth-shatteringly delectable and others are simply to-die-for. Well, today, the one I am presenting undoubtedly belongs to the second category. It is unquestionably one of the best chocolate cakes I have ever savored.

I found the recipe for this "Drop Dead Chocolate Cake" on Jamie's wonderful blog "My Baking Addiction" in October 2011. As soon as I laid my eyes on that dark beauty covered and filled with fudgy buttercream, I knew I had to prepare it as soon as possible. Promise made, promise kept. To celebrate the new year, I cococted this intensely cocoa-y, delightfully moist, devilishly rich, divinely morish and extraordinarily decadent confection. Needless to say that we enragedly devoured it like a couple of hungry wolves and that it disappeared incredibly swiftly. A chocolate lover's dream come true! Epic.

Chocolate Cake 5 1 bis

~ Drop Dead Chocolate Cake ~
Cake recipe adapted from "My Baking Addiction" and chocolate buttercream frosting adapted from "Savory Sweet Life".

Yields 8 servings.

Ingredients For The "Chocolate Sponge":
2 Cups (410g) Castor sugar
1 3/4 Cups (223g) All-purpose flour
3/4 Cup +2 Tbs (80g) Unsweetened cocoa powder (Cailler)
2 Tsp Baking soda
1 Tsp Baking powder
1 Tsp Fine sea salt
2 Eggs (~63g)
1 Cup (240ml) Buttermilk
1 Cup (240ml) Strong black coffee
1/2 Cup (105ml) Vegetable oil (neutral tasting)
2 Tsp Pure vanilla extract
Ingredients For The " Chocolate Buttercream Frosting":
1 Cup +1 Tbs (250g) Unsalted Butter, softened (not melted)
3 1/2 Cups (420g) Powdered sugar (sifted)
3/4 Cup (68g) Cocoa powder (Cailler, sifted)
2 Tsp Strong black coffee
2 Tsp Pure vanilla extract
1/2 Tsp Fine sea salt 
4 Tbs Milk

Method For The "Chocolate Sponge":
1. Heat the oven to 350° F (180° C). Butter and flour one 9-inch (23cm) round springform pan. Set aside.
2. In the bowl of a stand mixer fitted with the whisk attachment or in a large bowl with an electric mixer, put the sugar, flour, cocoa, baking soda, baking powder and salt. Mixing on low speed until the dry ingredients are thoroughly combined.
3. Add the eggs, buttermilk, coffee, oil and vanilla, then beat on medium speed for about 2 minutes (the batter will be thin, that's totally normal).
4. Pour the batter into the prepared pan.
5. Bake for 35 to 40 minutes or until a cake tester inserted in center comes out clean. Let cool for 10 minutes, then remove from the pan and place on the wire rack. Cool completely. 

Rose 1 2 bis

Method For The " Chocolate Buttercream Frosting":
5. Meanwhile, with a stand mixer (paddle attachment), cream the butter for a few minutes.
6. Turn off the mixer and add the powdered sugar and cocoa. On the lowest speed, mix the until the dry ingredients have been absorbed by the butter.
7. Increase the mixer speed to medium and add coffee, vanilla extract, salt and milk.
8. Beat for 3 minutes.
Method For "Assembling The Cake":
9. Cut the cake into two equal layers.
10. Place the bottom layer on a cake plate and frost with 1/3 of the buttercream.
11. Cover with the top layer and with the remaining buttercream, frost the cake as desired. 

Comments:
If your frosting needs a more stiff consistency, add a little more sugar or if it needs to be thinned out, add more milk, 1 tbs at a time.
This cake can also be covered with chocolate ganache.

Serving suggestions:
Serve this cake at any hour of the day or night (it is so decadent that you'll not be able to control yourself and will mercilessly pounce on it LOL) and accompany it with cold milk, strong coffee or sparkling wine (champagne, Clairette de Die, Prosecco, etc...).

~~~~~~~~~~~~~~~~~~~~~~


~ Gâteau Au Chocolat De La Mort Qui Tue ~
Gâteau adapté de "My Baking Addiction" et glaçage au chocolate adapté de "Savory Sweet Life".

Pour 8 personnes.

Ingrédients Pour Le "Gâteau Au Chocolat": 
410g de Sucre cristallisé 
223g de Farine 
80g de Cacao en poudre (non-sucré, Cailler)
2 CC de Bicarbonate de soude
1 CC de Poudre à lever
1 CC de Sel de mer fin
2 Oeufs (~ 63g)
240ml de Babeurre (lait ribot) 

240ml de Café fort 
105ml d'Huile végétale (goût neutre)
2 CC d'Extrait de vanille pure
Ingrédients Pour Le "Glaçage Au Chocolat": 
250g de Beurre non-salé ramolli (pas fondu) 
420g de Sucre en poudre/glace (tamisé) 
68g de Cacao en poudre (non-sucré/ Cailler/tamisé)
2 CC de Café fort
2 CC d'Extrait de vanille pure
1/2 CC de Sel de mer fin
4 CS de Lait

Méthode Pour Le "Gâteau Au Chocolat":
1. Préchauffer le four à 180 ° C. Beurrer et fariner un moule rond (à charnière) de 23cm. Le mettre de côté.
2. Mettre le sucre, la farine, le cacao, le bicarbonate de soude, la poudre à lever et le sel d
ans le bol d'un batteur électrique (équipé de l'accessoire batteur plat) et mélanger à basse vitesse jusqu'à ce que les ingrédients secs soient bien mélangés.
3. Ajouter les oeufs, le babeurre, le café, l'huile et la vanille, puis battre à vitesse moyenne pendant environ 2 minutes (la pâte sera liquide, mais c'est tout à fait normal).
4. Verser la pâte dans le moule.
5. Cuire pendant 35 à 40 minutes ou jusqu'à ce que la lame d'un couteau insérée au centre en ressorte propre. Laisser refroidir pendant 10 minutes, puis retirer du moule et placer le gâteau sur une grille. Faire refroidir complètement.


Chocolate Cake 1 4 bis

Méthode Pour Le "Glaçage Au Chocolat":
5. Pendant ce temps, battre le beurre en pommade à l'aide d'un batteur.
6. Éteindre le batteur et ajouter le sucre en poudre et le cacao. A petite vitesse, mélanger les ingrédients secs jusqu'à ce qu'ils aient été incorporés au beurre.
7. Augmenter la vitesse du mélangeur à moyen et ajouter le café, l'extrait de vanille, le sel et le lait.
8. Battre pendant 3 minutes.
Méthode Pour "L'assemblage Du Gâteau»:
9. Couper le gâteau en deux couches égales.
10. Placez la couche inférieure sur une assiette à gâteau et couvrir avec 1/3 du glaçage.
11. Recouvrir avec la couche supérieure et avec le reste du glaçage, glacer le gâteau comme vous le souhaitez.
 
Remarques:
Si votre glaçage est trop liquide, alors ajouter un peu de sucre en poudre. Si il est trop épais, ajouter un peu de lait (1 CS à la fois).
Ce gâteau peut aussi être recouvert de ganache au chocolat.

Idées de présentation:
Servir ce gâteau à n'importe quelle heure de la journée ou de la nuits (il est tellement bon qu'il vous sera impossible de vous contrôler LOL), accompagné d'un verre de lait, d'une tasse de café fort ou de vin mousseux (Champagne, Clairette de Die, Prosecco, etc...).

Chocolate Cake 4 1 bis

Friday, January 28, 2011

0 LEMON & PASSIONFRUIT ENTREMET - THE DARING BAKERS

dk-group-1
It makes me really angry to NEVER be able to finish my challenges before the deadline. I always promise myself to start early, yet I am by no means able to commit to it. So, this is the reason why I consistently embark on my baking adventure at the very last minute and put myself under a lot of stress. I've come to the conclusion that it is the way I function. Unfortunately, stress will everlastingly be a part of my personality...

The January 2011 Daring Bakers’ challenge was hosted by Astheroshe of the blog "Accro". She chose to challenge everyone to make a "Biscuit Joconde Imprime" to wrap around an "Entremets" dessert.

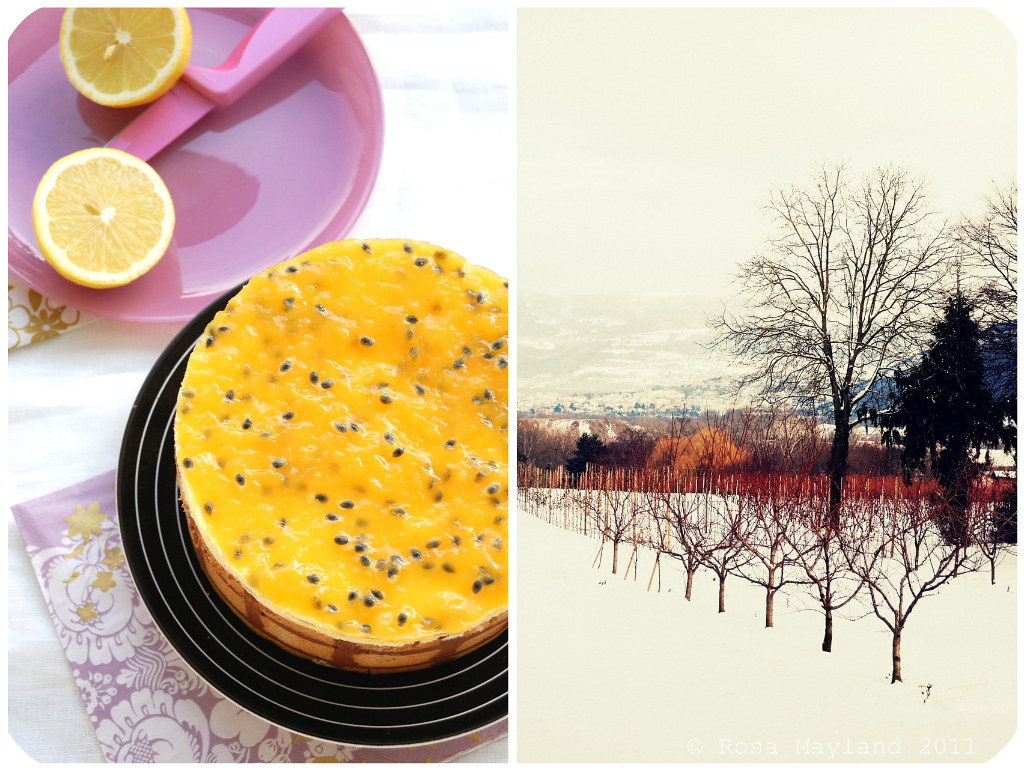
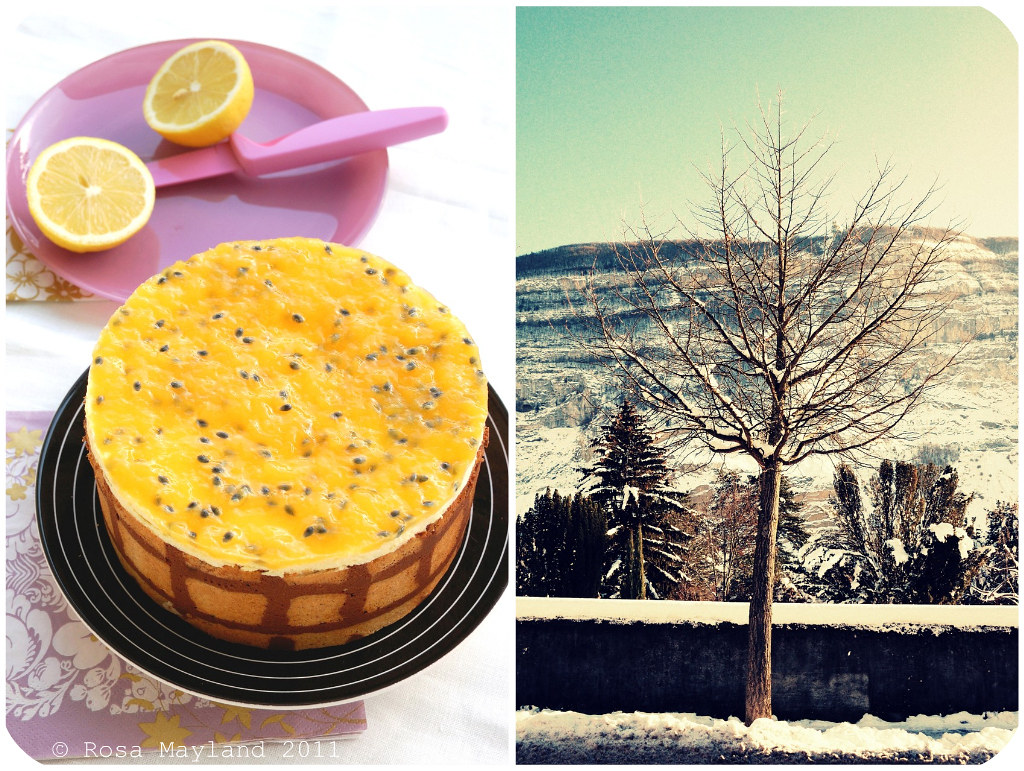
Entremet Lemon Picnik collage 4 bis
This cold ornate dessert usually has many different layers of cake, mousse (Bavarian cream mousse or simple mousse) and is decorated with either jelly, whipped cream or a fruit coulis. It is one of my favorite sweet courses especially when it is of the chocolaty or fruity (lime, lemon, passionfruit, mango, raspberry, etc...) kind. I particularly like the dainty looks, elaborate details, freshness, lightness and exquisiteness of "Entremets".

At home we regularly ate those refined treats. My mother was not the type of hobby-baker who enjoyed preparing complex goods, she was more a person who liked to keep things uncomplicated. Baking like a pâtissier was never one of her aims. She didn't want to wander out of her comfort zone and wasn't as curious food-wise as me. Luckily for us my father happened to work just a few meters away from a very good "pâtisserie-boulagerie" (how convenients LOL) and came back home at least once a week (before he retired, he was one of their most faithful customers and also bought croissants on a daily basis) with luscious confections which we goobbled voraciously.

The day before his buying spree my father made sure to ask us what we wanted in order for him to place an order early the next morning. I remember that the prospect of eating Confiserie Ducret's amazing creations filled me with the highest joy. I can't recall how many times I ordered their gorgeous millefeuilles filled with three rich chocolate truffle mousses (black, milk & white) and their ambrosial mango or raspberry mini "Entremets". Heavenly and dreamlike, unless you remember that this might have been one of the reasons why you weren't exactly the thinnest girl at school (thankfully, I have lost those extra pounds now)...

Well, although I was looking forward to
devour my "Lemon & Passionfruit Entremet", I somehow was not too excited at the prospect of putting it together as even if I'm an audacious person in the kitchen, I'm not exactly the kind of girl who is passionate about all things technical. This challenge's difficulties were concentrated on our ability to draw patterns with the cocoa paste, have measuring abilities and cut our cake with extreme precision. That is exactly everything I hate to do. It makes me panic as I know that I'm not the best in that domain and have no patience for such exercizes!

Anyway, apart from slightly burning my joconde cake (the recipe had certain flaws - the baking temperature and the amount of time during which the cake has to stay in the oven are wrong) which resulted in a not very flexible cake wrappers that tended to break every time I tried to line the mold, the whole process wasn't really as complicated as I imagined. I started baking at 7pm and ended the challenge by 9h30pm. Not a bad timing considering the fact that it was the first time that I baked an "Entremet" and had to continually wash the dishes, pans and make space in my kitchen since it is as small as a rat's hole.

What intense physical activity and mental pressure! I can tell you that after those hours of strainous spinning around the place like a wheel, working like a mad woman on speed and praying the gods of success to not let me down I was wrecked and not capable of funtioning anymore.

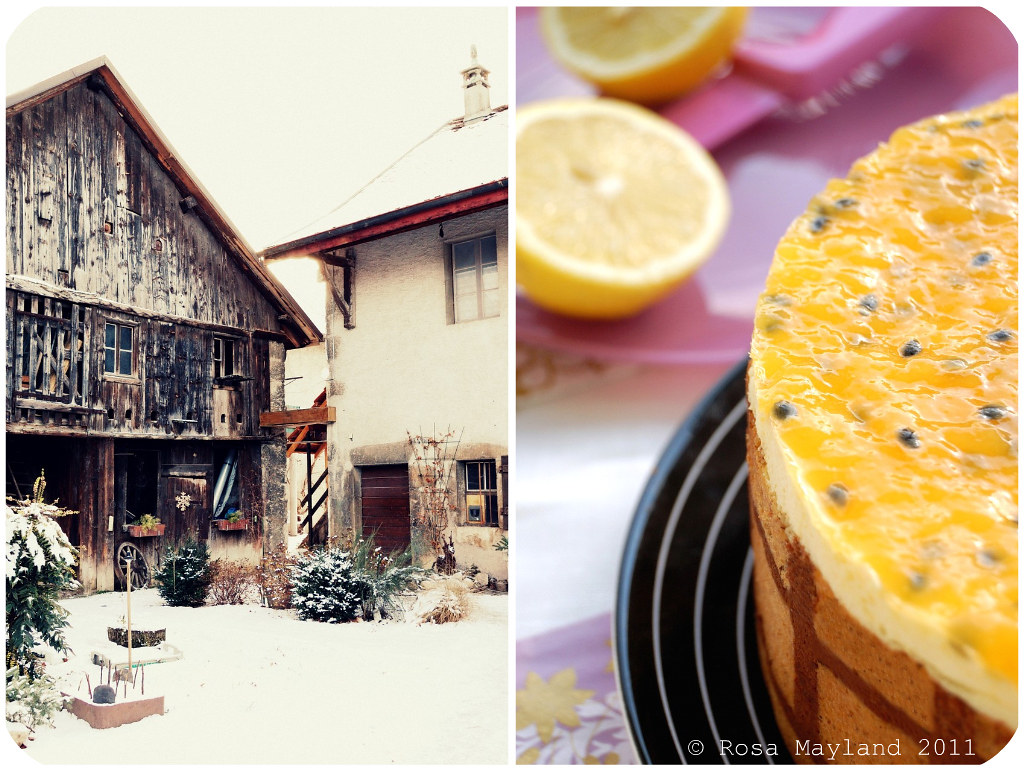
Thankfully, the heavens above didn't let me down nor did my "Lemon & Passionfruit Entremet" which turned out to look surprisingly presentable even if it had a few tears here and there. Overall I was satisfied with my creation as not only was it an eyepleaser, but also a delight for the tastebuds.

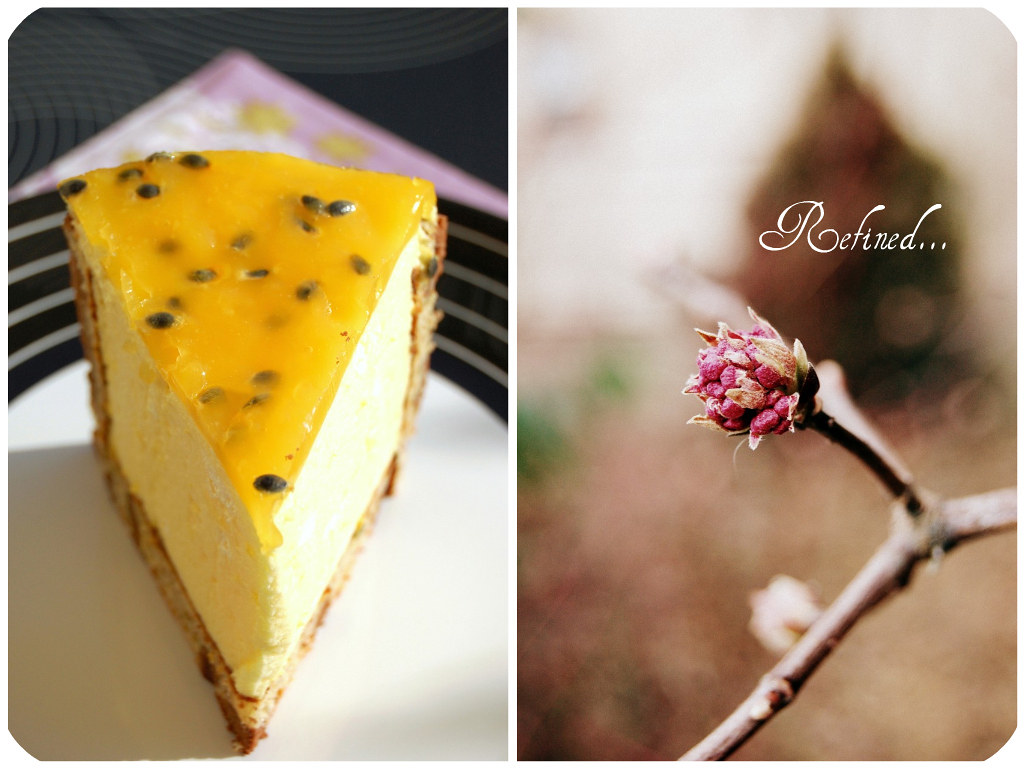
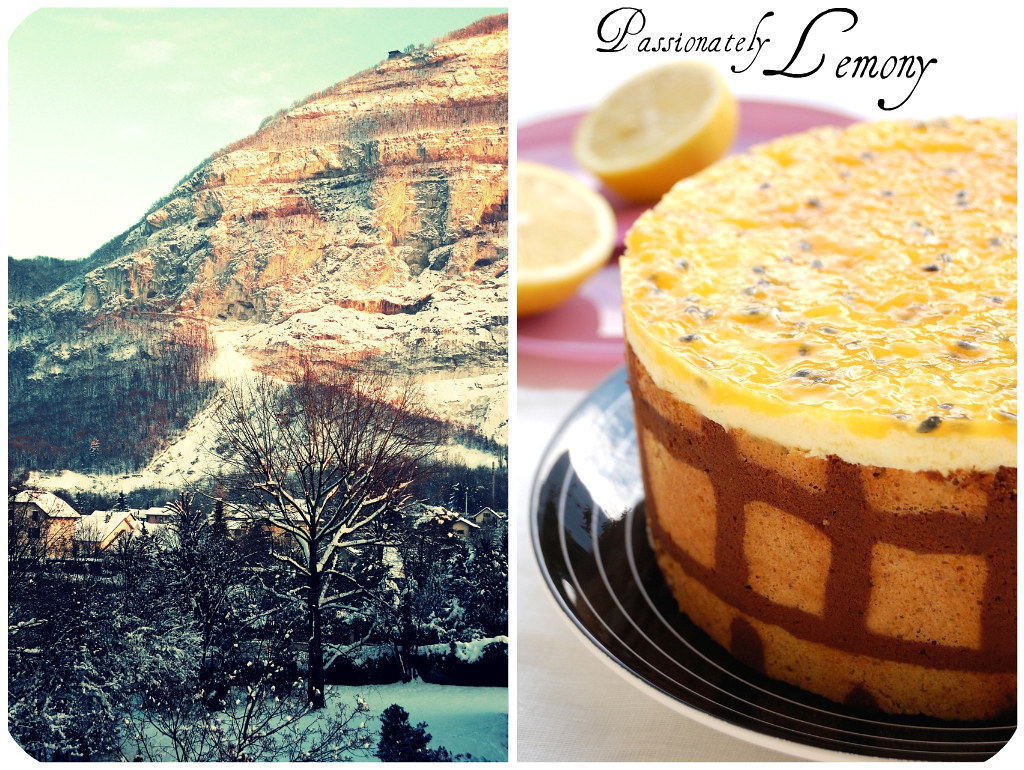
This "Lemon & Passionfruit Entremet" has a blissfull texture and taste. The joconde cake is pleasantly spongy and nutty, the mousse filling is mindblowingly airy, light and intensely lemony, and the passionfruit jelly topping is constrastingly firm and exhaliratingly fragrant. A combination that cannot fail to bring a smile on the saddest of faces or to uplift the most depressed of souls!

entremet Lemon Picnik collage 5 bis
~ Lemon & Passionfruit Entremet ~
Recipe by
Chef John O. from The International Culinary School in Atlanta, Georgia USA.

Yields 1x 15cm diameter entremet .

Preparation time:

It takes about 2h30 to 3h30 (2h for the joconde and 30min - 1h30 for the filling).

Equipment required:

. Silpat
. 1/2 Baking sheets or a 13” x 18” jelly roll sheet (rimmed baking sheet)
. Mixer (optional)
. Bowls
. Knives
. Offset spatula
. Regular spatula
. Pastry comb (optional)
. Rulers
. Spring form pan
. Biscuit cutter (or ring mold, or cut PVC pipe, or whatever else you can think of to use as a mold for individual desserts)
. Torte/entremets mold/Springform pan/ Trifle dish (for larger desserts)
. Cling wrap . Parchment paper
. Gel, paste or liquid food coloring (optional)

~~~~~~~~~~~~~~~~~~~~~~

Entremet Lemon Picnik collage 1 bis
JOCONDE SPONGE

For one 33x46cm (13inchx8inch) jelly roll pan.

Ingredients:
3/4 Cup (3oz/85g) Almond flour/meal (You can also use hazelnut flour, just omit the butter) 1/2 Cup + 2 Tbs (2 2/3oz/75g) Confectioners' sugar
1/4 Cup (1 oz/25g) Cake flour
3 Large Eggs (about 5 1/3oz/150g)
3 Large Egg whites (about 3oz 90g)
2 1/2 Tsp (1/3oz/10g) White granulated/castor sugar or superfine sugar
2 Tbs (1oz/30g) Unsalted butter, melted

Method:
1. In a clean mixing bowl whip the egg whites and white granulated sugar to firm, glossy peeks. 2. Reserve in a separate clean bowl to use later.
3. Sift almond flour, confectioner’s sugar, cake flour. (This can be done into your dirty egg white bowl.)
4. On medium speed, add the eggs a little at a time. Mix well after each addition. Mix until smooth and light. (If using a stand mixer use blade attachment. If hand held a whisk attachment is fine, or by hand. )
5. Fold in one third reserved whipped egg whites to almond mixture to lighten the batter. Fold in remaining whipped egg whites. Do not over mix.
6. Fold in melted butter.
7. Reserve batter to be used later.

~~~~~~~~~~~~~~~~~~~~~~

Entremet Sunset copy 1.1 bis
PATTERERNED JOCONDE - DECOR PASTE

Yields one 33x46cm (13inchx8inch) jelly roll pan (I made the half).

Ingredients:
7 Tbs (3.5oz/100g) Unsalted butter, softened
3/4 Cups + 3/4 Tbs (3.5oz/100g) Confectioners' sugar
3.5 Large Egg whites (about 3.5oz/100g)
5/4 Cup (3.8oz/110g) Cake flour
Food coloring gel, paste or liquid

COCOA Décor Paste Variation:
Reduce cake flour to 3oz/85g.
Add 1oz/30g cocoa powder.
Sift the flour and cocoa powder together before adding to
creamed mixture.

Directions:
1. Cream butter and sugar until light and fluffy. (Use stand mixer with blade, hand held mixer, or by hand.)
2. Gradually add egg whites. Beat continuously.
3. Fold in sifted flour.
4. Tint batter with coloring to desired color, if not making cocoa variation.

~~~~~~~~~~~~~~~~~~~~~~

Entremet Lemon Picnik collage 2 bis
PREPARING THE JOCONDE - HOW TO MAKE PATTERNS

Method:
1. Use a piping bag. Pipe letters, or polka dots, or a piped design. If you do not have a piping bag. Fill a ziplock bag and snip off corner for a homemade version of one piping bag.
2. Slide the baking sheet with paste into the freezer. Freeze hard. Approx 15 minutes.
3. Remove from freezer. Quickly pour the Joconde batter over the design. Spread evenly to completely cover the pattern of the Décor paste.
4. Bake at 400ºF /200ºC until the joconde bounces back when slightly pressed, approx. 10-15 minutes. You can bake it as is on the upside down pan. Yes, it is a very quick bake, so watch carefully
5. Cool. Do not leave too long, or you will have difficulty removing it from mat.
6. Flip cooled cake on to a powdered sugared parchment paper. Remove silpat. Cake should be right side up, and pattern showing! (The powdered sugar helps the cake from sticking when cutting.)

~~~~~~~~~~~~~~~~~~~~~~

Entremet Lemon Half copy bis
PREPARING THE MOLD FOR THE ENTREMET & LINING IT

Method:
1. A biscuit cutter/ cookie cutter- using cling wrap pulled tightly as the base and the cl
ing covering the outside of the mold, placed on a parchment lined very flat baking sheet.
2. Line the inside with a curled piece of parchment paper overlapping.

3. Decide how thick you want your “Joconde wrapper”. Traditionally, it is 1/2 the height of your mold. This is done so more layers of the plated dessert can be shown. However, you can make it the full height.
4. Once your height is measured, then you can cut the cake into equal strips, of height and length. (Use a very sharp paring knife and ruler.)
5. Make sure your strips are cut cleanly and ends are cut perfectly straight. Press the cake strips inside of the mold, decorative side facing out. Once wrapped inside the mold, overlap your ends slightly. You want your Joconde to fit very tightly pressed up to the sides of the mold. Then gently push and press the ends to meet together to make a seamless cake. The cake is very flexible so you can push it into place. You can use more than one piece to “wrap “your mold, if one cut piece is not long enough. (I I lined the base of my entremet with Joconde cake.)
6. The mold is done, and ready to fill.

Note:
If not ready to use. Lay cake kept whole or already cut into strips, on a flat surface, wrap in parchment and several layers of cling wrap and freeze.

~~~~~~~~~~~~~~~~~~~~~~

LEMON MOUSSE & PASSIONFRUIT JELLY

Method:
I filled my entremet with 1 quantity "Lemon Mousse" and added a layer of "Passionfruit Jelly" that I made with 4 passionfruits (emptied), 2 Tbs lemon juice, 2 Tbs castor sugar (mix all three ingredients together) and 2 sheets jelly (softened in cold water, strained, melted over very low heat and added to the fruit mixture which you can leave pour over the mousse - refrigerate the entremet in order to solidify the jelly).

~~~~~~~~~~~~~~~~~~~~~~

Etant donné que je suis en vacance et que je n'ai pas beaucoup de temps pour bloguer, je n'ai malheureusement pas pu faire une traduction française de ce billet et je m'en excuse auprès de tous mes amis lecteurs et blogueurs francophones!

C'est pourquoi je vous suggère de vous rendre sur le blog mentionné ci-dessous. Vous y trouverez cette recette en version française.

Chez Isa de "Les Gourmandises d'Isa" (Canada)

Entremet Lemon Picnik collage 3 bis

Saturday, February 27, 2010

0 TIRAMISÙ - THE DARING BAKERS

Is it me or time is really passing so fast? It seems that since I last blogged about the January Daring Bakers' challenge I barely have been able to sit down and think about the following one. Nowadays, I never get to finish completing my challenges before the very last minute (last day mostly)...

Anyhow, it is with great joy that I write about the February 2010 Daring Bakers’ challenge which is hosted by Aparna of "My Diverse Kitchen" and Deeba of "Passionate About Baking". They chose "Tiramisù" as the challenge for the month. Their challenge recipe is based on recipes from The Washington Post, "Cordon Bleu At Home" and Baking Obsession.

As I am a big "Tiramisù" fan and I love testing different recipes, Aparna and Deeba's choice could not have made me more happy. My excitment was also multiplied by the prospect of trying my hand for the very first time at baking "Ladyfingers" and making my own "Mascarpone Cheese". Awesome!

"Tiramisù" is one of the most popular desserts/cakes hailing from Italy. It is composed of light, crispy and sweet Génoise cake-like biscuits called "Ladyfingers" (or "Savoiardi") which are dipped in espresso or strong coffee or rum, a whipped mixture made with egg yolks, mascarpone cheese, sugar and is sprinkled with cocoa. This kind of pudding is somehow comparable to the French "Charlotte" or the English "
Trifle".

The origins of "Tiramisù" are not very clear as there is no documented mention of the dessert before 1983. Some think that it is a recent invention. Apparently, "Tiramisù" was created in 1971 in Treviso by Giuseppe Di Clemente. Several sources claim that "Tiramisù" was invented in Treviso at Le Beccherie restaurant by the god-daughter and apprentice of confectioner Roberto Linguanotto, Francesca Valori, whose maiden name was Tiramisu. It is believed that Linguanotto named the dish in honour of Francesca's culinary skill. Then, other sources report the creation of the cake to have originated in the city of Siena in honour of Cosimo III on the occasion of his visit to the city. Alternatively, accounts by Carminantonio Iannaccone as researched and written about by The Washington Post and Baltimore Magazine establish the creation of "Tiramisù" by him on December 24, 1969, in Via Sottotreviso while he was head chef at Treviso, near Venice.


To be perfectly honest with you, I don't really give a damn who invented this dessert or when it was created as the one thing that comes to my/our minds when thinking about it is it's incomparable deliciousness that is so soul-uplifting and mind-boggling. No wonder the phrase "tirami su" literally means "pick me up" or "pull me up" in Italian...

Making this recipe was not difficult in itself. The diverse componenets (ladyfingers, mascarpone cheese, pastry cream, zabaglione, whipped cream) were not very complicate to realize and, for the exception of "Ladyfingers" and "Mascarpone Cheese", I already knew how to make the other elements composing this dessert. My main problem resided in finding the right dish to contain that "pudding" since all of my dishes were not deep enough. Somehow, I managed to find a dish that was not as shallow as all the others...

Although the "Tiramisù" was extremely unphotogenic (very difficult to unmold cleanly, thus looking somewhat like a "dog's dinner" and only wanted to lean dangerously on one side like the Tower of Pisa), it was nonetheless a real success once it hit our palates.

The taste of that dessert is just divine and it's texture is heavenly. All the aromas blend perfectly together in order to create a sweet symphony of flavors that'll blow your brains out. That "Tiramisù" dissolves without chewing and is so silky, smooth, creamy, fluffy, spongy in texture. Orgasmically luscious!


Many thanks to Aparna & Deeba for making me discover a different version of that Italian speciality and for intriducing me to the art of homemade "Mascarpone Cheese" and "Ladyfingers".


~ TIRAMISÙ ~

Mascarpone Cheese - Vera’s Recipe (Baking Obsession) for Homemade Mascarpone Cheese Savoiardi/ Ladyfinger Biscuits – Recipe from Cordon Bleu At Home
Tiramisu – Carminantonio's Tiramisu recipe from The Washington Post, July 11 2007

Makes one 20 x 20cm (8 x 8 inch) Tiramisù or 6 servings.

PREPARATION TIME:

Tiramisu is made up of several components which can be made separately and ahead of time and put together the day before serving.
Making tiramisu from scratch requires about 2 to 3 days (including refrigeration) from when you start making the mascarpone to the time the tiramisu is served.
So this challenge requires some prior planning. Please read the instructions as you need to begin making the mascarpone at least a day in advance. The zabaglione & pastry cream also need 4 hours to an overnight for chilling, as does the main dessert.The flavours mature after an overnight rest, and the dessert can be kept refrigerated for 2-3 days.

Once assembled, the tiramisu can be frozen till you need to serve it, in case you are not serving it immediately.

~~~~~~~~~~~~~~~~~~~~~~~

TIRAMISÙ

This recipe makes 6 servings.

Ingredients for the "Zabaglione":
2 Large egg yolks
3 Tbs Sugar/50gms

1/4 Cup/60ml Marsala wine (or port or coffee)

1/4 Tsp/1.25ml Pure vanilla extract

1/2 Tsp Finely grated organic lemon zest
Ingredients for the "Vanilla Pastry Cream":

1 Cup/235ml Chilled heavy cream (I used 25%)
1/4 Cup/55gms Sugar

1/2 Tsp/2.5ml Pure vanilla extract
Ingredients to assemble the "Tiramisù":
2 Cups/470ml Brewed espresso, warmed

1 teaspoon/5ml rum extract (optional/I used 1 3/4 Cups espresso and 1/4 Cup Whiskey)
1/2 Cup/110gms Sugar
1/3 Cup/75gms Mascarpone cheese
3
6 Savoiardi/ ladyfinger biscuits (you may use less)
2 Tbs/30gms Unsweetened cocoa powder


Method for the "Zabaglione":
1. Heat water in a double boiler (If you don’t have a double boiler, place a pot with about an inch of water in it on the stove. Place a heat-proof bow
l in the pot making sure the bottom does not touch the water).
2. In a large mixing bowl (or stainless steel mixing bowl), mix together the egg yolks, sugar, the Marsala (or espresso/ coffee), vanilla extract and lemon zest. Whisk together until the yolks are fully blended and the mixture looks smooth.
3. Transfer the mixture to the top of a double boiler or place your bowl over the pan/ pot with simmering water. Cook the egg mixture over low heat, stirring constantly, for about 8 minutes or until it resembles thick custard (It may bubble a
bit as it reaches that consistency).
4. Let cool to room temperature and transfer the zabaglione to a bowl. Cover and refrigerate at least 4 hours or overnight, until thoroughly chilled.


Method for the "Vanilla Pastry Cream":

1. Mix together the sugar, flour, lemon zest and vanilla extract in a medium heavy-bottomed saucepan. To this add the egg yolk and half the milk. Whisk until smooth.
2. Now place the saucepan over low heat and cook, stirring constantly to prevent the mixture from curdling. Add the remaining milk a little at a time, still stirring constantly (After about 12 minutes the mixture will be thick, free of lumps and beginning to bubble. If you have a few lumps, don’t worry. You can push the cream through a fine-mesh strainer).
3. Transfer the pastry cream to a bowl and cool to room temperature. Co
ver with plastic film and refrigerate at least 4 hours or overnight, until thoroughly chilled.
Method for the "Whipped Cream":

1. Combine the cream, sugar and vanilla extract in a mixing bowl.
2. Beat with an electric hand mixer or immersion blender until the mixture holds stiff peaks. Set aside.
Method to "Assemble The Tiramisù":
1. Have ready a rectangular serving dish (about 8" by 8" should do) or one of your choice.
2. Mix together the warm espresso, rum extract and sugar in a shallow dish, whisking to mix well. Set aside to cool.

3. In a large bowl, beat the mascarpone cheese with a spoon to break down the lumps and make it smooth (This will make it easier to fold).
4. Add the prepared and chilled zabaglione and pastry cream, blending until just combined.

5. Gently fold in the whipped cream. Set this cream mixture aside.
6. Now to start assembling the tiramisu. Workings quickly, dip 12 of the ladyfingers in the sweetened espresso, about 1 se
cond per side. They should be moist but not soggy.
7. Immediately transfer each ladyfinger to the platter, placing them side by side in a single row (You may break a lady finger into two, if necessary, to ensure the base of your dish is completely covered).
8. Spoon one-third of the cream mixture on top of the ladyfingers, then use a rubber spatula or spreading knife to cover the top evenly, all the way to the edges.

9. Repeat to create 2 more layers, using 12 ladyfingers and the cream mixture for each layer. 10. Clean any spilled cream mixture; cover carefully with plastic wrap and refrigerate the tiramisu overnight.
11. To serve, carefully remove the plastic wrap and sprinkle the tiramisu with cocoa powder using a fine-mesh strainer or decorate as you please.

12. Cut into individual portions and serve.

~~~~~~~~~~~~~~~~~~~~~~

MASCARPONE CHEESE

This recipe makes 12oz/ 340gm of mascarpone cheese.

Ingredients:

474ml (approx. 500ml)/2 Cups Whipping (36 %) pasteurized (not ultra-pasteurized), preferably organic cream (between 25% to 36% cream will do)
1 Tbs Fresh lemon (organic) juice


Method:

1. Bring 1 inch of water to a boil in a wide skillet. Reduce the heat to medium-low so the water is barely simmering.
2. Pour the cream into a medium heat-resistant bowl, then place the bowl into the skillet. Heat the cream, stirring often, to 190 F/87° C (If you do not have a thermometer, wait until small bubbles keep trying to push up to the surface). It will take about 15 minutes of delicate heating.
3. Add the lemon juice and continue heating the mixture, stirring gently, until the cream curdles (Do not expect the same action as you see during ricotta cheese making. All that the whipping cream will do is become thicker, like a well-done crème anglaise. It will cover a back of your wooden spoon thickly. You will see just a few clear whey streaks when you stir).
4. Remove the bowl from the water and let cool for about 20 minutes.
5. Meanwhile, line a sieve with four layers of dampened cheesecloth and set it over a bowl. Transfer the mixture into the lined sieve (Do not squeeze the cheese in the cheesecloth or press on its surface. Be patient, it will firm up after refrigeration time).
6. Once cooled completely, cover with plastic wrap and refrigerate (in the sieve) overnight or up to 24 hours.

Notes:
The first time I made mascarpone I had all doubts if it’d been cooked enough, because of its custard-like texture. Have no fear, it will firm up beautifully in the fridge, and will yet remain lusciously creamy.
Keep refrigerated and use within 3 to 4 days.

~~~~~~~~~~~~~~~~~~~~~~

LADYFINGERS/ SAVOIARDI BISCUITS

This recipe makes approximately 24 big ladyfingers or 45 small (2 1/2" to 3" long) ladyfingers.

Ingredients:
3 Eggs, separated
6 Tbs/75gms Granulated sugar

3/4 Cup/95gms Cake flour, sifted (or 3/4 cup all purpose flour + 2 tbsp corn starch)

6 Tbs/50gms Confectioner's sugar

Method:
1. Preheat your oven to 350° F (175° C) degrees, then lightly brush 2 baking sheets with oil or softened butter and line with parchment paper.
2. Beat the egg whites using a hand held electric mixer until stiff peaks form.
3. Gradually add granulate sugar and continue beating until the egg whites become stiff again, glossy and smooth.
4. In a small bowl, beat the egg yolks lightly with a fork and fold them into the meringue, using a wooden spoon.
5. Sift the flour over this mixture and fold gently until just mixed (It is important to fold very gently and not overdo the folding. Otherwise the batter would deflate and lose volume resulting in ladyfingers which are flat and not spongy).
6. Fit a pastry bag with a plain tip (or just snip the end off; you could also use a Ziploc bag) and fill with the batter. Pipe the batter into 5"/12.5cm long and 3/4"/2cm wide strips leaving about 1"/2.5cm space in between the strips.
7. Sprinkle half the confectioner's sugar over the ladyfingers and wait for 5 minutes (The sugar will pearl or look wet and glisten). Now sprinkle the remaining sugar (This helps to give the ladyfingers their characteristic crispness).
8. Hold the parchment paper in place with your thumb and lift one side of the baking sheet and gently tap it on the work surface to remove excess sprinkled sugar.
9. Bake the ladyfingers for 10 minutes, then rotate the sheets and bake for another 5 minutes or so until the puff up, turn lightly golden brown and are still soft.
10. Allow t
hem to cool slightly on the sheets for about 5 minutes and then remove the ladyfingers from the baking sheet with a metal spatula while still hot, and cool on a rack.

Note:
Store them in an airtight container till required. They should keep for 2 to 3 weeks.

~~~~~~~~~~~~~~~~~~~~~~~

ADDITIONAL INFORMATION
Site Links:
Step by step pictures for making Tiramisù (including zabaglione & pastry cream).
Gluten Free Ladyfingers - 1000 gluten-free recipes by Carol Fenster (ladyfingers pg 436, Tiramisu pg 651).
Gluten free Ladyfingers & Tiramisù.
Diary Free Tiramisu - Levana Cooks Diary-Free by Lévana Kirschenbaum,
Menachem Adelman, Meir Pliskin (pg 86).
Video links for making "Tiramisu":
These are not for the recipe given for this challenge, but the procedure in the video would be a helpful guide.
Gordon Ramsay's video for dipping savioardi

~~~~~~~~~~~~~~~~~~~~~~

Etant donné la longueur du texte original, je n'ai malheureusement pas pu faire une traduction française de ce billet et je m'en excuse auprès de tous mes amis lecteurs et blogueurs francophones!

C'est pourquoi je vous suggère de vous rendre sur le blog mentionné ci-dessous. Vous y trouverez cette recette en version française.

Chez Isa de "Les Gourmandises d'Isa" (Canada)


breakfasts time Copyright © 2011 - |- Template created by O Pregador - |- Powered by Blogger Templates