Showing posts with label Biscuits. Show all posts

Friday, February 10, 2012

0 ISABELLE'S ARTISANAL OREOS - ORÉOS MAISON D'ISABELLE

Oreo 3 2 bis
A fellow who does things that count, doesn't usually stop to count them.
- Albert Einstein

A bit of fragrance always clings to the hand that gives roses.
- Chinese Proverb
The blogosphere is brimming with heartwarming suprises and extraordinary individuals. Since I have started Rosa's Yummy Yums in 2005 it has never ceased to amaze me and blow my mind. This ever-growing community of culinary geeks and fanatics who share the same passion for cooking and baking is like a second family to me.

Throughout the years, I have met a load of fascinating people and made some very good friends among my fellow bloggers, some of which I have been lucky enough to meet physically and others I still dream of having a cup of coffee with in the future.

Of course, I am not exactly so naive as to believe that everything is shiny, pink and perfect in this virtual world. As a matter of fact, it is without a doubt no different from reality. Concurrence is big there too, so you'll sometimes come across a lot of rip-offs as well as mean and jealous trolls with a complex of inferiority and be the favorite target of anonymous psychos who get thrills out of insulting and harassing you.

Nonetheless, even if there were days when I felt discouraged, disgusted and depressed because a sad and ugly mofo with a twisted mind decided to vent his/her spleen on me in order to relieve himself/herself of his/her frustration, anger, hate and low self-esteem by bringing me down and making me feel bad, I have not let this adversity destroy me. What kept me going was the awareness that there is also a lot of kindness and generosity out there to outbalance the negativity.
Too often we underestimate the power of a touch, a smile, a kind word, a listening ear, an honest compliment, or the smallest act of caring, all of which have the potential to turn a life around.
- Leo Buscaglia


One man practicing kindness in the wilderness is worth all the temples this world pulls.
- Jack Kerouac
For example, last week, when I was feeling rather low-spirited and wrote about my life story, I received many supportive and attentionate comments as well as personal messages which showed me that I was not alone, gave me hope, encouraged me to follow my path and brought back a smile on my face. This display of attention touched me deeply and I wish to thank my readers and colleague foodies for their sympathy, solicitude and friendship. You rule!

Lately, I have also been blessed to win a few giveaways and to be offered a bunch of wonderful cookbooks. Speaking of which, a few months ago Isabelle Lambert of the popular "Les gourmandises d'Isa" sent me an exemplary of her first publication. How nice and thoughtful of her. I was extremely thrilled that she had thought of me...

I have known this young woman for quite long now - we started blogging and joined The Daring Bakers practically at the same time - and have followed every step of her journey as a gourmande, so it is a enormous honor for me to present her work on my site.

Is
abelle was born in France and
has been living in Québec (Canada) for about a decade. She hails from a family of professional bakers/pâtissiers, butchers/pork butchers and caterers, and grew up being surrounded by cuisine enthusiasts who produced their own fare, hence it is no wonder that she cultivates a strong interest for the arts of the table.

This bubbly and dynamic lady decided to start a blog to stock all her recipes and constantly have them to hand, but after a while, comments came in and she began to realize that what she created impacted on others. As a result, she began to take this activity more seriously and put together posts with more detailed explanations and better pictures. Over the years, she gained many followers and ranks among the most influential French-speaking bloggers on the internet.


In her book, Isabelle shares 150 of her favorite recipes inspired by her love for Québecois and North American chefs. It is chock-a-block full a ideas for delectable savory dishes such as quiches, Flemish beef stew, caramel pork, rillettes de Mans, monkfish blanquette, chicken tajine with dried apricots, lobster rolls as well as  abunding with marvelous sweet treats (2/3 of the book is dedicated to desserts) such as piña colada muffins, maple syrup bars, creamy orange tart, bacon toffee, coffe éclairs, churros, salty caramel spread and many more.

Provided that you can read and understand the language of Molière (no translation exists),
"Les Gourmandises d'Isa" is a lovely compendium of family-style, easy-to-achieve and tasty specialitise which will satisfy your appetite for fullfilling and comforting grub.

After a lot of hard-thinking and endless flipping through the pages of this softcover (taking decisions isn't my strong point), I finally decided that I was going to share with you Isabelle's own version of the famous Oreos.
I am still convinced that a good, simple, homemade cookie is preferable to all the store-bought cookies one can find.
- James Beard


Noncooks think it's silly to invest two hours' work in two minutes' enjoyment; but if cooking is evanescent, so is the ballet.
- Julia Child
I occasionally buy the original cookies when I come across a packet in my supermarket and moderatly appreciate that confection, yet I can't say that I entirely understand the fad about them nor that I can really say I find them as irresistible as everybody does. Originally, I was attracted to them because I have an open mind, thus I like trying new things and because they are a symbol of a country - USA- I dream of visiting and which's gastronomy I adore. However, I prefer not to consume junk on a regular basis (only rarely and there are still things I categorically refuse to touch) as I try to ban as much industrial "food" as possible from my diet. As a result, Oreos have only graced the shelves of my cupboard twice and I am seriously considering ending my relationship (if there was ever one, though) with them right now considering that they can easily be replicated at home.
We are living in a world today where lemonade is made from artificial flavors and furniture polish is made from real lemons.
- Alfred E. Newman
High-tech tomatoes. Mysterious milk. Supersquash. Are we supposed to eat this stuff? Or is it going to eat us?
- Annita Manning
Homemade Oreos are by far my drug of choice. Not only are they made with 100% natural ingredients, but they have a finer taste too. It is impossible to compare them with those produced by Nabisco, a division of Kraft Foods and another big corporation whose interest is not your health, but rather to create monopoly control over the food system.

Unlike the palm oil-loaded, additive-ladden, nutrient-poor and fashionable wafers, Isabelle's Oreos (which I have slighty altered - salt added to the filling and I substituted the margarine with butter) don't have a cardboardy/dusty flavor or fail to deliver oomph. Those "Artisanal Oreos" are not overly sweet and offer an intense aroma of cocoa, vanilla and butter. Once you've bitten into one, you'll get hooked and will forget your addiction for the manufactured stuff. It is definitely worthwhile investing efforts into the baking of those babies as store-bought biscuits cannot compare to these!

Oreo 2 3 bis

~ Artisanal Oreos ~
Recipe adapted from Isabelle's book, "Les Gourmandises d'Isa".

Makes about 20 Oreos.


Ingredients for "Cookies":

80g (5 Tbs + 1 Tsp) Unsweetened cocoa
113g (7/8 Cup) All-purpose flour
1 Pinch Fine sea salt
125g (1/2 Cup + 1 Tsp) Unsalted butter

200g (5/8 Cup - 1 Tsp) Castor sugar
1 Big Egg (~ 63g)
1/2 Tsp Pure vanilla extract
Ingredients For The "Filling":
125g (1/2 Cup + 1 Tsp) Unsalted butter
125g (1 Cup + 1 Tsp) Icing sugar
1 Tsp Pure vanilla extract
1/2 Tsp Fine sea salt


Method For The "Cookies":
1. Sift the flour, cocoa and salt together. Set aside.
2. Cream the butter and sugar together in order to obtain a pale, fluffy and creamy mixture.
3. Add the egg and vanilla. Mix well until fully incorporated.
4. Add the dry ingredients and using a spatula, mix well until just blended (don't knead).
5.
Wrap the dough in clear plastic wrap and store in the fridge for 15 minutes.
6. Preheat the oven to 160° C (325° F).
7. Sprinkle your work surface with cocoa, then roll out the dough to a thickness of 5 mm.
8. Using a fluted round cookie cutter (4 cm/1.6 inch in diameter), cut the dough into about 40 rounds (you can re-roll the scraps).


Oreo Snow Village 1 1 bis

9. Place cookies on prepared baking sheets 2.5 cm apart.
10.
Place the cookie sheets in the freezer for 15 minutes.
11. Bake the cookies in the middle of the oven for 15 minutes.
12. Remove them from the oven and let them cool on a wire rack.
Method For The "Filling":
13. Beat the butter, until light and creamy.
14. Add the powdered sugar, vanilla and salt, then beat well until smooth.

Method For "Assembling The Oreos"
15.
After cookies have cooled, put 1 1/2 Tsp of the filling between two cookies, putting bottom sides together.

Comments:
It is very important to freeze the pastry rounds if you do not want the cookies to spread out while baking.

Serving suggestios:
Eat your Oreos with a glass of ice cold milk.

 ~~~~~~~~~~~~~~~~~~~~~~

Oreo 1 1 bis bis tagged

~ Oréos Maison ~
Recette adaptée du livre "Les gourmandises d'Isa" par Isa du blog "Les Gourmandises d'Isa".

Pour environ 20 oréos.

Ingrédients Pour Les "Cookies":
80g de Cacao non-sucré
113g de Farine blanche
1 Pincée de Sel de mer fin
125g de Beurre non-salé
200g de Sucre cristallisé
1 Oeuf (~63g)
1/2 CC d'Extrait de vanille pure
Ingredients Pour La "Garniture":
125g de Beurre non-salé
125g de Sucre glace/en poudre
1 CC d'Extrait de vanille pure
1/2 CC de Sel de mer fin
Méthode Pour Les "Cookies": 
1. Tamiser ensemble la farine, le cacao et le sel. Mettre de côté.
2. Battre le beurre et le sucre en pommade, jusqu'à obtention d'une crème légère et pâle.
3. Ajouter l'oeuf et la vanille. Bien incorporer.
4. Ajouter les ingrédients secs et bien incorporer à l'aide d'une spatule, mais sans pétrir.
5. Réserver la pâte 15 minutes au frigo.
6. Préchauffer le four à 160° C.
7.  Saupoudrer le plan de travail avec du cacao, puis abaisser la pâte sur une épaisseur de 5 mm.
8.
À l'aide d'un emporte-pièce rond cannelé de 4 cm de diamètre, couper la pâte en ~ 40 cercles (vous pouvez rouler les retailles).

Oreo Snow Salève 1 8 bis

9. Déposer les biscuits sur les plaques préparées, en les espaçant de (2,5 cm).
10. Mettre les plaques à biscuits au congélateur pendant 15 minutes (opération très importante, si on ne veut pas que les biscuits s'étalent).
11. Cuire les biscuits au centre du four pendant 15 minutes.
12. Les sortir du four et les laisser complètement refroidir bien à plat sur une grille.
Méthode Pour La "Garniture": 
13. Battre le beurre, jusqu'à l'obtention d'une préparation légère et crémeuse.
14. Incorporer le sucre en poudre, la vanille et le sel, puis bien battre le tout, jusqu'à obtention d'une texture homogène et légère.
Méthode Pour Le "Montage Des Oreos":
15. Retourner la moitié des biscuits à l'envers et couvrir chacun d'eux avec 1 1/2 CC de garniture.
16. Poser les autres biscuits sur le dessus de la garniture en pressant légèrement pour former des sandwichs.

Commentaires:
Il est impératif de mettre les ronds de pâte au congélateur car sans cela, il vous sera impossible de les cuire sans qu'ils ne s'étalent.

Idées de présentation:
Déguster avec un verre de lait très froid.

Oreo 4 2 bis

Sunday, February 27, 2011

0 PANNA COTTA WITH OATMEAL FLORENTINES - DARING BAKERS

dk-group-1
When the Daring Bakers deadline approaches I always tend to reflect on how weeks pass incredibly fast and it never fails to surprise me to see that it is impossible to have a grip on it. For fun I decided to count the number of challenges I have accomplished since I joined this group at the end of 2007 (first DB post). It was with much pride that I discovered I have been a faithfull member of the Daring Bakers since 3 years and 5 monthes. Until now I have made 42 treats under high-pressure, spent countless hours in the kitchen sweating and cursing, never skipped one event and as I'm the queen of last-minute baking sprees I was never able to get started before the last moment, thus increasing my overall stess like crazy....

Although it is an activity I enjoy it is sometimes difficult to find the time to bake for the Daring Bakers
as the recipes are time-consuming and the weeks go by at light speed. Not forgetting that the post-baking process (taking pictures and writing my posts) cannot be done hastily and demands efforts, at least not in my case. This hobby is quite exhausting and the work we have to provide is generally arduous. One has to be creative, concentrated and well-organize, plan things in advance and have a clear mind in order to succeed. You really have to be a passionate baker to carry out the tasks as it requires skills and lots of determination.

Florentines & Panna Cotta Picnik collage 4 bis
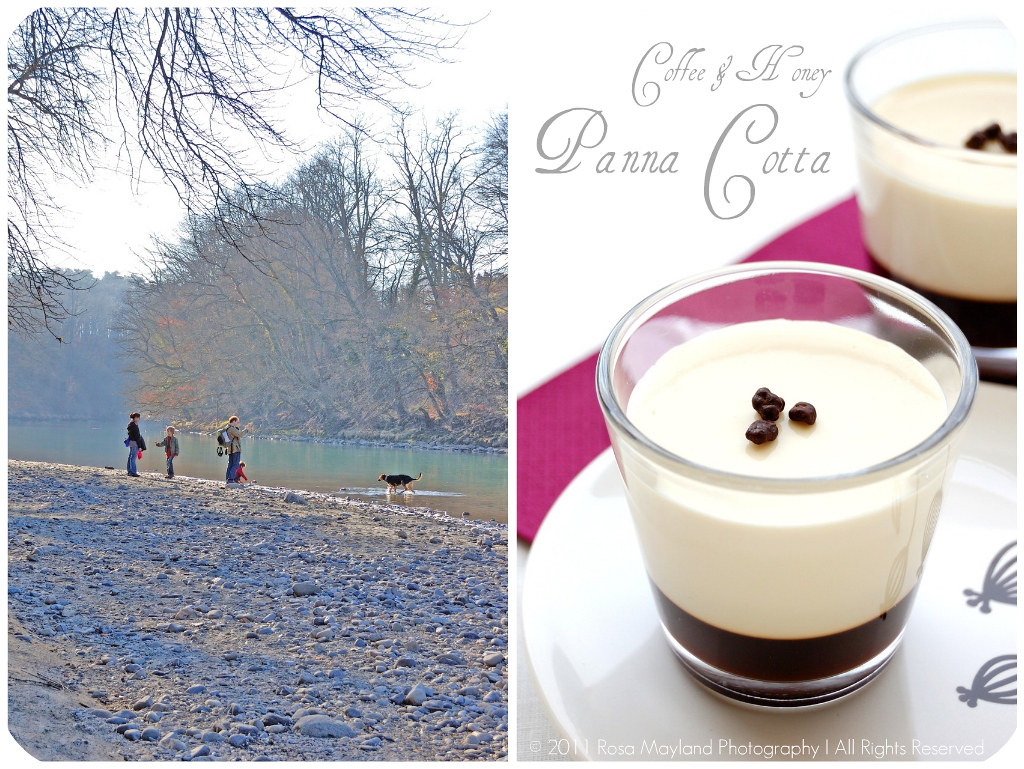
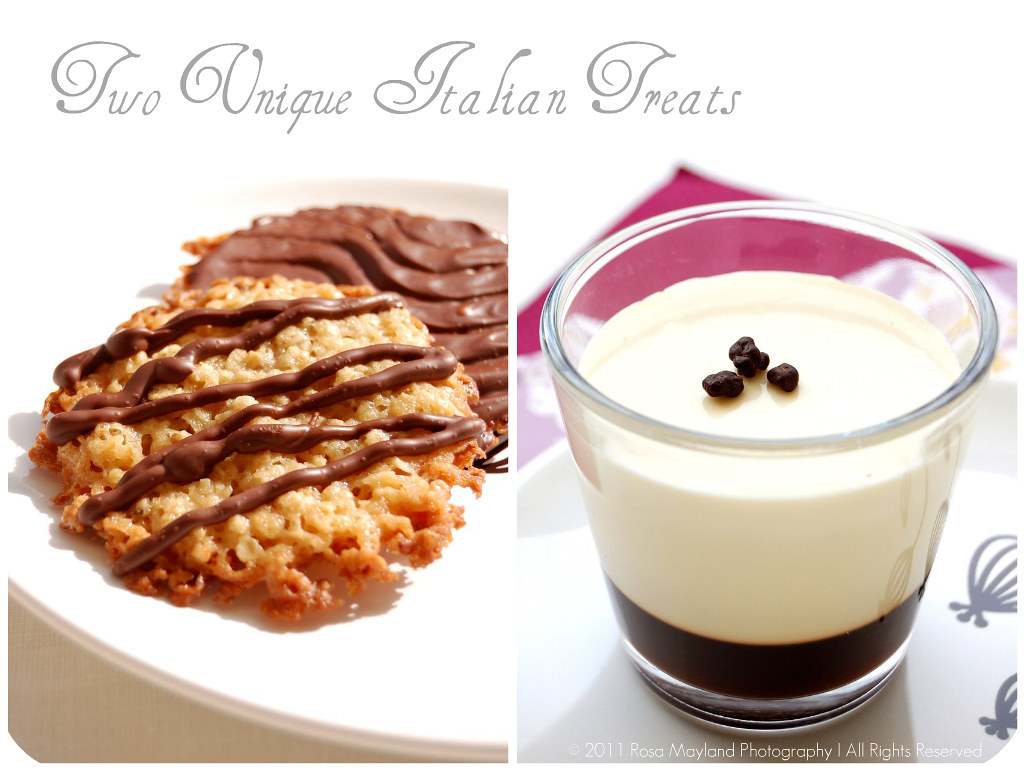
The February 2011 Daring Bakers' challenge was hosted by Mallory from "A Sofa in the Kitchen" who chose to challenge everyone to make "Panna Cotta" from a Giada De Laurentiis recipe and Nestlé "Florentine Cookies". As you can see, this month's trial was thankfully not intimidating at all and the recipes were no backbreakers. Although it was the first time that I prepared both specialities I was unusually laidback and enjoyed baking casually without breaking into a cold sweat. A first for me!

"Panna Cotta" and "Florentine Cookies" are two Italian delicacies which are very popular with foodies all around the world. The first dessert item hails from Piemont (northern part of the country), but can be found everywhere in Italy. "Panna Cotta" means "cooked cream". It's origin is unclear yet there are theories that suggest that in the mountainous regions unsweetened cream (to which was incorporated fish gelatine made with the bones) was eaten with plain, fresh fruits or hazelnuts (sugar was added to the preparation only lately). Similar versions can be found in Greece/Turkey (Kazan Dibi), Finland (Hedelmärahka) and France (Blanc-Manger). The second goodie is accredited to Austrian bakers, but it owe's it's origin from Florence in Tuscany. Those wonderful round lace biscuits are traditionally confectioned with nuts (generally sliced almonds), candied fruits (orange, cherries, lemon etc...), caramel and chocolate.

I must admit that I was a little skeptical and not really thrilled at the idea of using a Nestlé recipe because I am really not a big fan of this big multinational corporation considering the fact that their methods are far from being the most sustainable (deforestation/palm oil) or humane (baby milk), that what they produce is far too industrial for my taste (junk/plastic/additive-ladden food - yuck!) and not healthy, and that they literally "eat" other enterprises, destroy their soul (what made them unique) and the quality of the original products (for example Cailler Chocolates, Cereal Partner's Shredded Wheats & Rowntrees' After Eights are really less good than when they were not made by Nestlé - and the list goes on unfortunately). I thought that we would rather be making a more artisinal and traditional recipe created by a professinal pâtissier (I mean, aside from being the "guru" of processed food, Nestlé is surely not an authority in the "real" food domain - nothing Slow-Foodish about them).

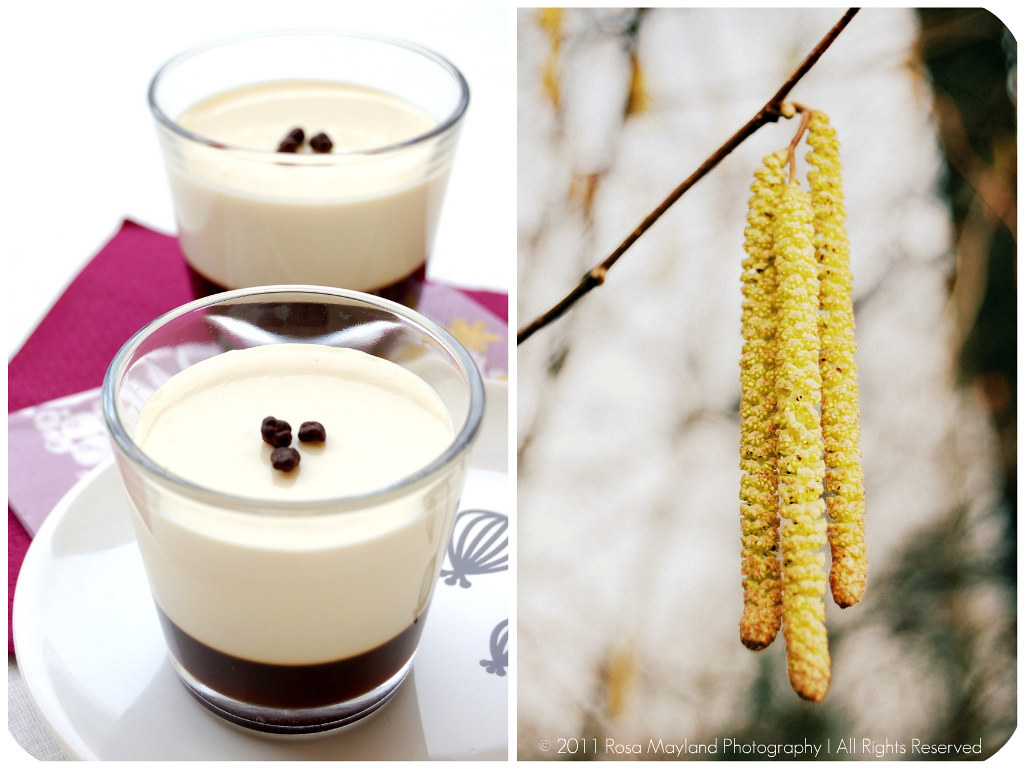
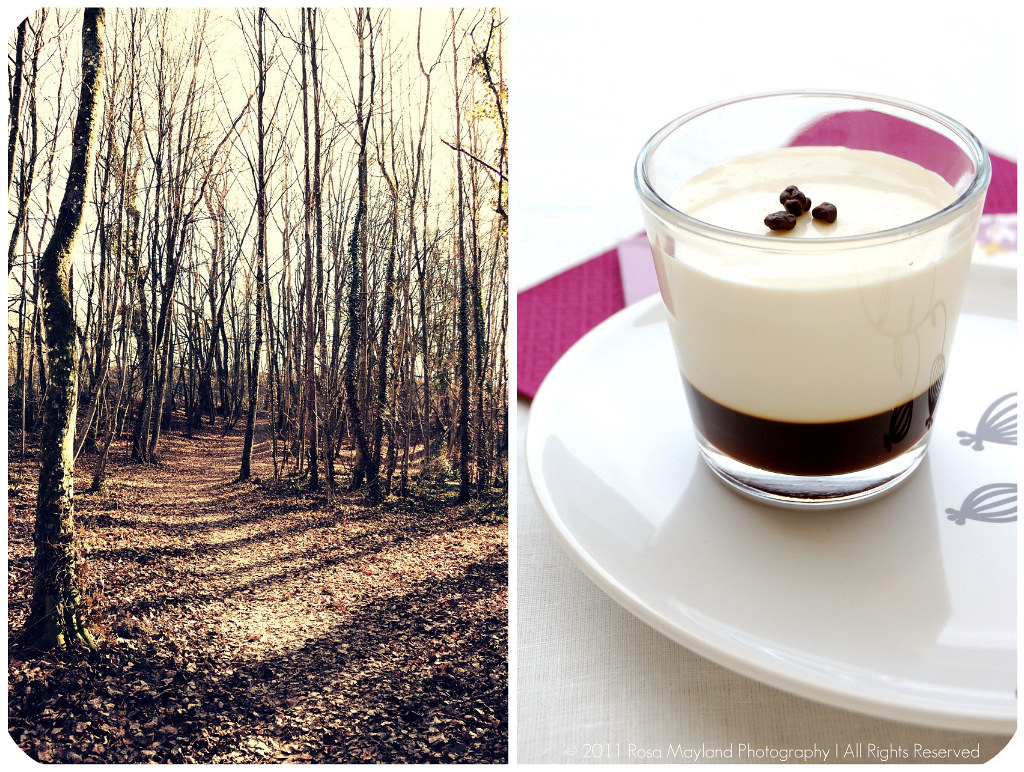
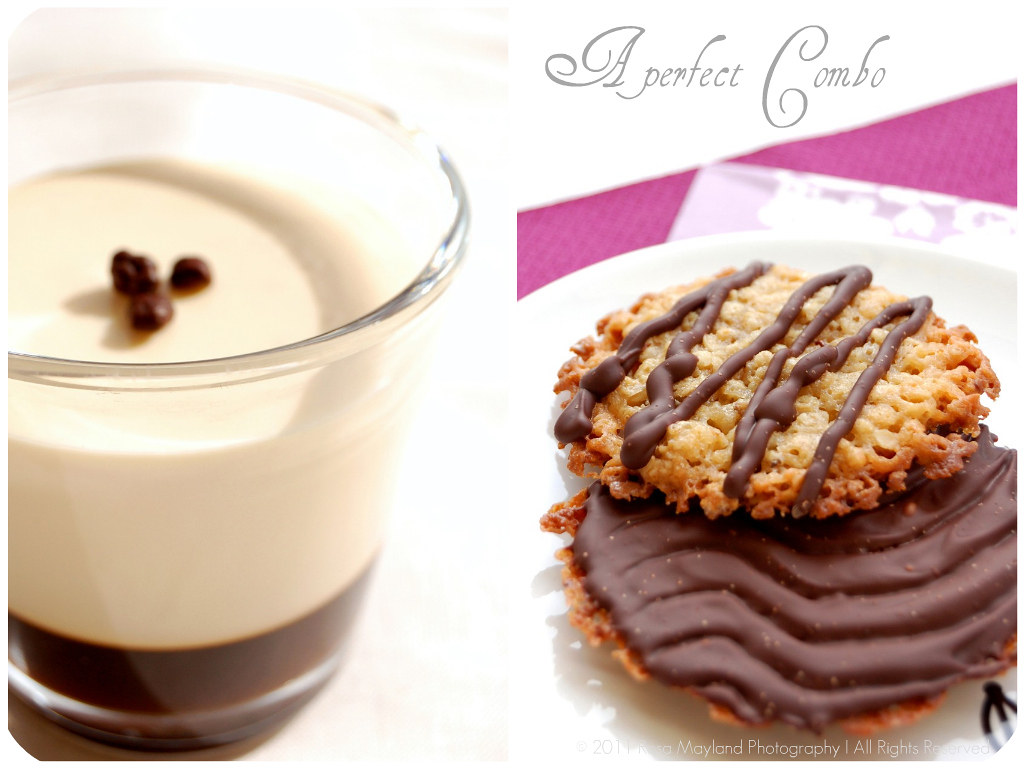
Anyway, despite a few hiccups when it came to the wetness of the dough (I had to add more flour in order for them to not spread out too much - maybe it had to do with the fact that I didn't use corn syrup), the "Florentine Cookies" turned out pretty well and I have to confess that they were deliciously crunchy, addictively chewy as well as oaty. Giada De Laurentiis' "Honey Panna Cotta" were just flawless, creamy, silky, voluptuous, refreshing, delicately flavored, subtly sweet as well as luscious. The Gourmet Magazine "Coffee Jelly" layer at the bottom of each verrine added a delightfully bitter and seductive toasty note to the "Panna Cotta". A perfect contrast which makes this dreamlike pudding more adult and uplifts it's somewhat faint aromas by bringing character and punch to the whole.

"Panna Cotta" will definitely grace my table again as it is very versatile, refined, yet extremely easy to put together. Even my personal tester (boyfriend) who is not in very good terms with jelly thought that it was terrific. And as we are big oatmeal lovers the "Florentine Cookies" had a short life span. The ultimate dessert combination!


Florentines & Panna Cotta Picnik collage 1 bis
~ Florentine Cookies & Vanilla Coffee Panna Cotta ~

Preparation time:
• 20-25 minutes to prepare the Panna Cotta - at least 6 hours to chill
• 20-25 minutes to prepare the cookies 6-8 minutes to bake

Equipment required:
• Small mixing bowl

• Two medium sized heavy bottom pot or saucepan
• Wooden spoon and/or whisk
• Glasses or ramekins - something to pour and serve your Panna Cotta in
• Measuring cups
• Measuring spoons
• Silpat or wax paper or parchment paper
• Baking sheet
• Small bowl

~~~~~~~~~~~~~~~~~~~~~~

Florentines & Panna Cotta Picnik collage 3 bis
Giada's Panna Cotta

Recipe by Giada De Laurentiis.

Ingredients:
1 Cup (240ml) Whole milk
1 Tbs (one packet/15ml/7g/¼oz) Unflavored powdered gelatin
3 Cups (720 ml) Whipping cream (35% butterfat)

1/3 Cup (80ml) Honey (strongly flavored - pine tree for example)
1 1/2 Pure vanilla extract
1 Tbs (15ml/15g/½oz) Granulated sugar

A pinch of salt

Method:
1. Pour the milk into a bowl or pot and sprinkle gelatin evenly and thinly over the milk (make sure the bowl/pot is cold by placing the bowl/pot in the refrigerator for a few minutes before you start making the Panna Cotta).
2. Let stand for 5 minutes to soften the gelatin.
3. Pour the milk into the saucepan/pot and p
lace over medium heat on the stove. Heat this mixture until it is hot, but not boiling, about five minutes (I whisk it a few times at th is stage).
4. Next, add the cream, honey, vanilla, sugar, and pinch of salt.

5. Making sure the mixture doesn't boil, continue to heat and stir occasionally until the sugar and honey have dissolved 5-7 minutes.
6. Remove from heat, allow it to sit for a few minutes to cool slightly. Then pour into the glass or ramekin.
7. Refrigerate at least 6 hours or overnight.
8. Add garnishes and serve.

~~~~~~~~~~~~~~~~~~~~~~

Florentines & Panna Cotta Picnik collage 5 bis
Coffee Gelée For The Panna Cotta

Adapted from this recipe in Gourmet Magazine

Ingredients:
2 Cups (480ml) Good quality brewed coffee

1/4 Cup (60 ml) Hot water + 2 Tbs (30ml) Cold water
1/2 Cup (120ml/115g/4oz) Granulated sugar
1 1/2 Tsps (7½ml/3½g/1/8oz) Unflavored powdered gelatin
2 Tsps (10ml) Pure vanilla extract

Method:
1. Place granulated sugar and 1/4 c. hot water in a small saucepan.
2. Bring to a boil, stir until the sugar has dissolved.

3. Sprinkle gelatin over 2 Tablespoons cold water and let it soften 2 minutes or so.
4. Stir the coffee, sugar, hot water, and vanilla into a small metal bowl, add gelatin mixture and stir well until gelatin has dissolved.
5. Pour into a glass (bottom) or over the panna cotta.

Note:

If pouring over Panna Cotta, be sure that this mixture is no longer hot, it will melt
Panna Cotta if it is, let it come to room temperature.

~~~~~~~~~~~~~~~~~~~~~~

Florentines & Panna Cotta Picnik collage 2 bis
Nestle Florentine Cookies

Recipe from the cookbook “Nestlé Classic Recipes”, and their website.

Makes about 2 1/2 - 3 dozen sandwhiched Florentine cookies.

Ingredients:

2/3 Cup (160ml/150g/5.3oz) Unsalted butter
2 Cups (480ml/160g/5 2/3oz) Quick oats

1 Cup (240ml/230g/8oz) Granulated sugar
2/3 cup (160ml/95g/3⅓oz) Plain (all purp
ose) flour
1/4 Cup (60ml) Dark corn syrup
1/4 Cup (60ml) Whole milk
1 Tsp (5 ml) Pure vanilla extract
A pinch of salt
1 1/2 Cups (360ml/250g/9oz) Dark or milk chocolate


Method:
1. Preheat oven to moderately hot 190° C (375° F).
2. Prepare your baking sheet with silpat or parchment paper.
3. Melt butter in a medium saucepan, then remove from the heat.
4. To the melted butter add oats, sugar, flour, corn syrup, milk, vanilla, and salt. Mix well.
5. Drop a tablespoon full, three inches (75mm) apart, onto your prepared baking sheet.
6. Flatten slightly with the back of your tablespoon, or use a spatula.

7. Bake in preheated oven for 6-8 minutes, until cookies are golden brown.
8. Cool completely on the baking sheets.
9. While the cookies are cooling melt your chocolate until smooth either in a double boiler, or a bowl that fits atop a saucepan filled with a bit of water (make sure the water doesn't touch the bottom of the bowl).
10. Peel the cookies from the silpat or parchment and place face down on a wire rack set over a sheet of wax/parchment paper (to keep counters clean).
11. Spread a tablespoon of chocolate on the bottom/flat side of your cookie, sandw
iching another (flat end) cookie atop the chocolate.

Remarks:
You can also choose not to sandwich yours, in which case, drizzle the tops with c
hocolate (over your wax paper).

~~~~~~~~~~~~~~~~~~~~~~

Etant donné que je suis en vacance et que je n'ai pas beaucoup de temps pour bloguer, je n'ai malheureusement pas pu faire une traduction française de ce billet et je m'en excuse auprès de tous mes amis lecteurs et blogueurs francophones!

C'est pourquoi je vous suggère de vous rendre sur le blog mentionné ci-dessous. Vous y trouverez cette recette en version française.

Chez Isa de "Les Gourmandises d'Isa" (Canada)

Florentines & Panna Cotta Picnik collage 6 bis

Friday, May 14, 2010

0 ITALIAN WINE BISCUITS - BISCUITS AU VIN


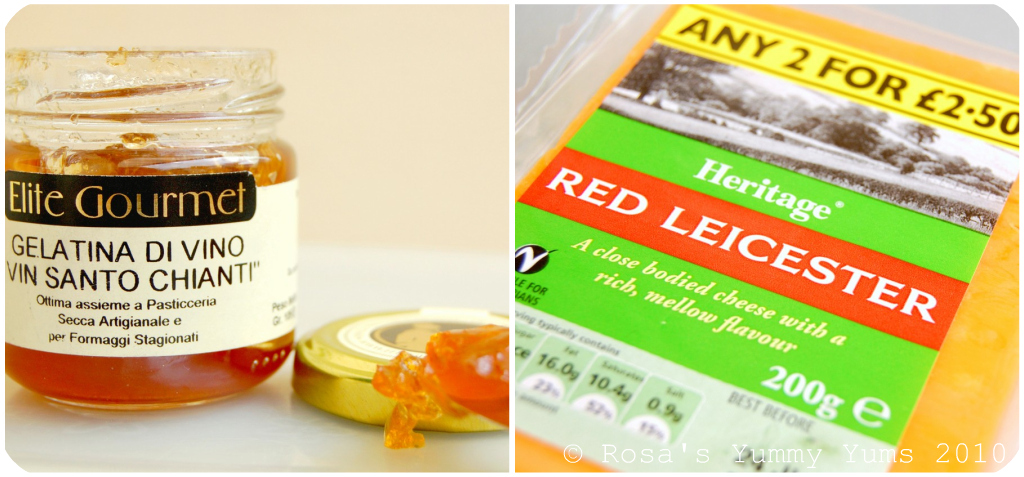
Not long ago, I bought a couple of cheeses (Red Leicester & Welsh Mature Cheddar) from "Jim's British Market", a British supermarket situated in neighboring France (Saint Genis-Pouilly). As it is not a delicacy we can eat on a weekly basis, we wanted to enjoy those yummy cheeses with a good glass of wine and the appropriate accompaniment...

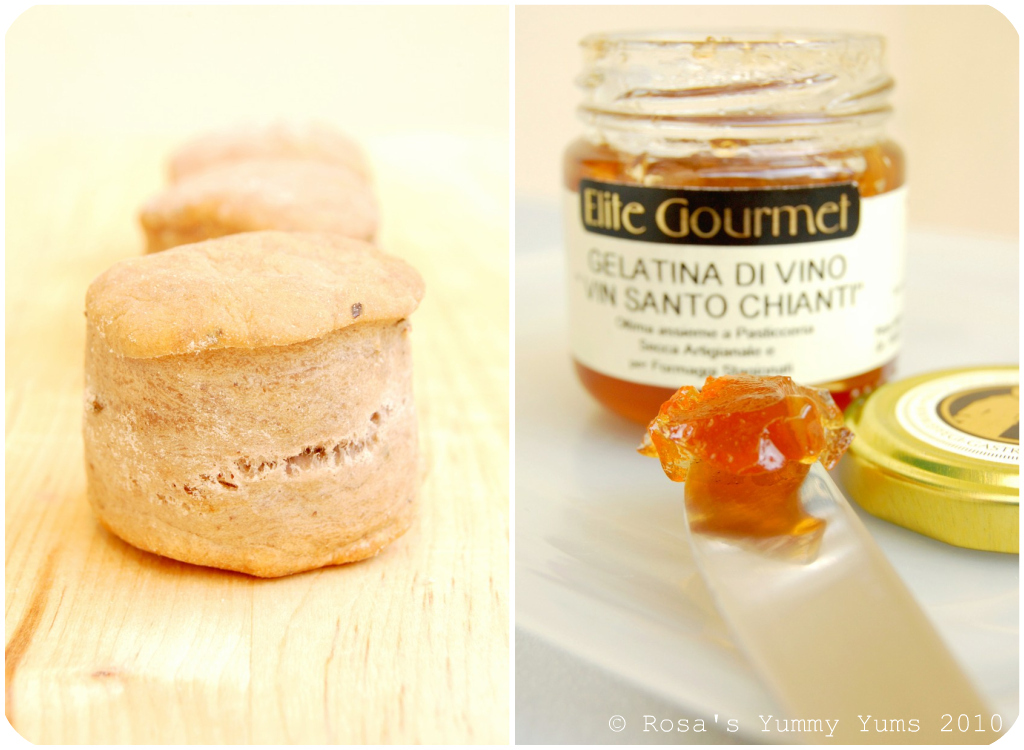
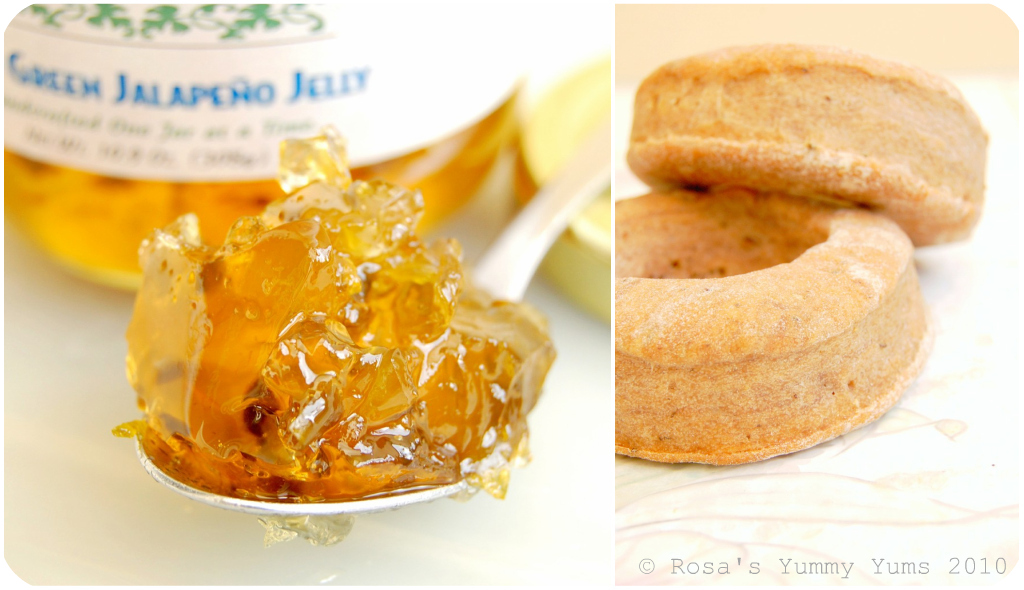
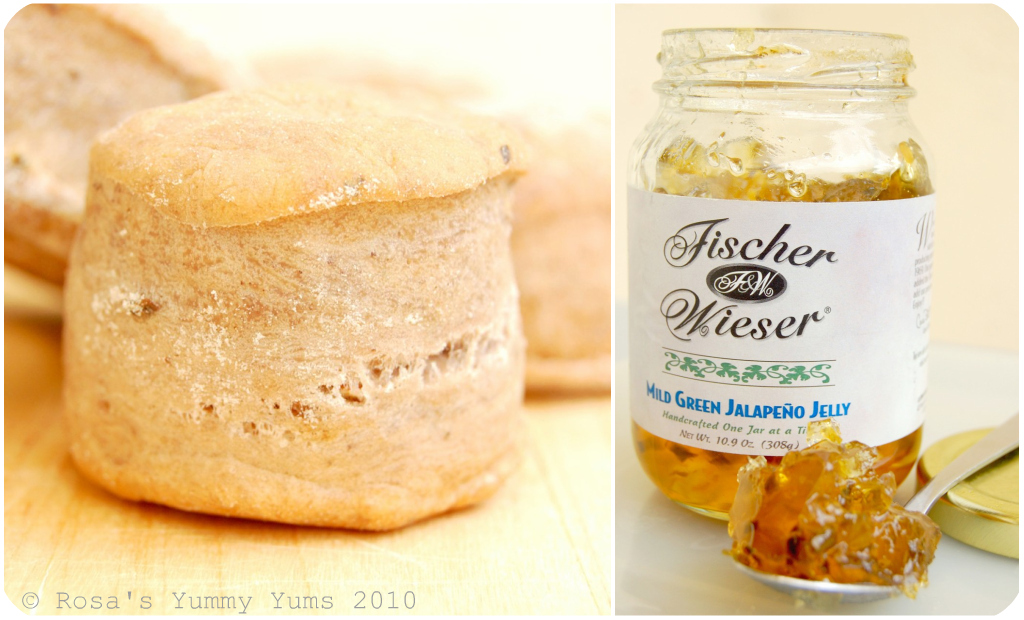
I also had two wonderful jellies - Green Jalapeño Jelly From Texas, USA
& Vin Santo Jelly from Italy - that I wanted to serve together with some good semi-hard gourmet cheese, it was the perfect opportunity to bake savory lush crackers. So, knowing that my "The King Arthur Flour Baker's Companion: The All-Purpose Baking Companion" contains many great cracker/biscuit ideas, it was without surprise that I found what I was looking for. As expected, the baked goods I made were very successful and turned out right; KAF's recipes are always a safe bet,

Considering the fact that pepper and Porto go very well with Cheddar-style cheeses, it was self-evident that KAF's sophisticated "Italian Wine Biscuits" ("Biscotti Di Vino" in Italian) would be the perfect pairing. Needless to say that we were delighted by their wonderful taste and pleasant texture.

Those dense and bready "Italian Wine Biscuits" are a bit like a cross between crackers (not as hard and flat, though) and scones (not as soft and fluffy either). They are crisp, semisweet biscuits which have a addictive, yet non overpowering peppery fragrance, subtle flavors of red wine and a delicate touch of salt. Terrific!

~ Italian Wine Biscuits ~

Recipe by The King Arthur Flour.


Yields about 32 biscuits.

Ingredients:
2 1/2 Cups (10 5/8 ounces) King Arthur Unb
leached All-Purpose Flour
2 Tsp Coarsely ground black pepper
4 to 6 Tbs (1 3/4 to 2 1/2 ounces) Sugar, to taste
1 Tsp Sea salt
2 Tsp Baking powder
1/2 Cup + 2 Tbs (5 ounces) Good dry red wine, such as Cabernet Sauvignon (non-alcoholic is fine)
1/4 Cup (1 3/4 ounces) Vegetable oil

Method:
1. In a medium-sized mixing bowl, combine the flour, pepper, sugar, salt and baking powder.
2. In a separate bowl, whisk together the wine and vegetable oil.
3. Add the liquid ingredients to the dry ingredients and mix well till the mixture is smooth, about 1 minute (see remarks).

4. Place the dough in plastic wrap and refrigerate it for at least 1 hour, or overnight.
5. Break off a piece of dough about the size of a walnut (about 3/4 oun
ce), and roll it into a ball. Poke a hole in the middle of the ball to make a small "bagel-shaped" biscuit.
6. Place it on a lightly greased or parchment-lined baking sheet. Repeat with
the remaining dough.
7. Bake the biscuits in a preheated 180° C (350° F) oven for 35 to 40 minutes, o
r until they're golden brown (they'll actually look kind of purple; that's OK).
8. Remove them from the oven, and cool completely on a wire rack.

Remarks:
The greater amount of sugar will make a biscuit which is just about as sweet as a cookie; the lesser amount will yield a more "savory-type" biscuit.
I added a little more wine to the mixture which turned out to be a bit too dry.
You can also just roll the pastry (
1.3cm/0.5 inch) and cut out rounds or squares.
Store those biscuits (at room temperature) in airtight containers for 3-4 days.

Serving suggestions:
Serve with cheese (perfect with Cheddar, Fontina or Pecorino), jalapeño jelly and with wine, grape juice spritzer, lemon-scented club soda or sangria.

~~~~~~~~~~~~~~~~~~~~~~

~ Biscuits Italiens Au Vin Rouge ~
Recette par The King Arthur Flour.


Pour 32 biscuits.

Ingrédients:
320g Farine blanche

2 CC Poivre noir, moulu grossièrement
4 à 6 Tbs (60 à 90g) de Sucre, selon goût
1 CC de Sel de mer
2 CC de Poudre à lever
150g/ml Vin rouge sec de qualité (Cabernet Sauvignon/sans alcool convient aussi)
53g d'Huile végétale


Méthode:
1. Dans un bol moyen, mélanger ensemble la farine, le poivre, le sucre, le sel et la p
oudre à lever.
2. Dans un autre bol, battre ensemble le vin avec l'huile.
3. Ajouter le mélange liquide au mélange sec et mélanger vigoureusement pendant 1 minute afin d'obtenir une pâte souple (voir remarques).
4. Emballer la pâte dans un film plastique et mettre au frigo pendant 1 heu
re ou toute une nuit.
5. Abaisser la pâte (1.3cm épaisseur) et découper des ronds (7cm) avec un emporte-pièce. Vous pouvez aussi découper des biscuits en forme de "bagel".
6. Mettre les biscuits sur la plaque de cuisson recouverte de papier sulfurisé.
7. Cuire les biscuits à 180° C (350° F) dans un four préchauffé pendant 35 to 40 minutes, ou jusqu'à ce que les biscuits soient joliment "dorés".
8. Retirer du four et faire refroidir sur une grille.


Remarques:
Si vous utilisez 90g de sucre, alors vos biscuits seront aussi sucrés que des cookies. Si vous ajoutez très peu de sucre vos biscuits seront plus salés (tels des crackers). a vous de choisir la quantité de sucre désirée.
J'ai dû rajouter un peu de vin car la pâte était un peu sèche.
Ces biscuits se conservent très bien 3 à 4 jours dans une boîte hermétiquement fermée.

Idées de présentation:
Ces biscuits sont délicieux avec du fromage (parfaits avec du Cheddar, de la Fontina ou du Pecorino) et de la gelée de piment jalapeño ou servis à l'apéritif avec du vin, de la sangria ou des cocktails.


breakfasts time Copyright © 2011 - |- Template created by O Pregador - |- Powered by Blogger Templates